IPM for Personify360 allows your subscribers to manage and update their own email preferences. Their current preferences are displayed in real time, and any changes to the associated form are updated in both Personify360 and Higher Logic Thrive Marketing Professional (Thrive Marketing Professional). This all occurs via a Thrive Marketing Professional form and does not require the subscriber to log into Personify360.
There are several benefits that come with Integrated Preference Management (IPM). You can have several subscriber-defined fields in Personify360 that Thrive Marketing Professional can use to create different personalizations, and perhaps more importantly, target groups. Likewise, you can bring over interests from Personify360 to populate your data input forms and to manage your subscribers' opt-in/opt-out preferences.
NOTE: Remember, the fields ultimately exist in Personify360. They are then used as interests in Thrive Marketing Professional. We'll learn more about this in the remaining sections.
Set Up IPM for Personify360 in Thrive Marketing Professional
The IPM extension must be turned on in your Thrive Marketing Professional account for the IPM for Personify360 features to work. Create a case to ensure that this extension is active.
Manage Customer Records
Add Interests to a Customer Record
Adding interests to a customer record in Personify360 allows you to associate a subscriber with that particular interest. There are two different interests in Personify360 that you can link to a subscriber: Demographic codes and Opt-in Interest Area codes.
Let's look at the steps to bring everything together on a customer record.
Add a Demographic Code/Subcode to a Customer Record
- Open Personify360
- Navigate to Customers > Customer Central. Search for an existing customer and double-click to open it.
- Click Demographics in the left panel.
- Click Lists, followed by Add.
- In the List Details panel, click the Demographics menu and select your desired demographic. Additionally, click the Sub-Demographics menu and select your desired sub-demographic.
- Click the Save icon at the top-right of the page. The Demographic and Sub-Demographic are now added to the customer record.
NOTE: You may need to restart Personify360 for the interest to appear on the record.
Add an Opt-In Interest to Customer Record
- Navigate to Customers > Customer Central. Search for an existing customer and double-click to open it.
- Click Participation in the left panel.
- Click Maintain Opt-In/Opt-Out preferences.
- In the Opt-In/Opt-Out Selections panel, click Add More Options.
- Check the corresponding checkboxes to add an interest. Click Opt-In when complete.
- Click the Save icon at the top right of the page. The selected interests are now added to the customer record.
NOTE: You may have to restart Personify360 for the interest to appear on the record.
Result
Once a Demographic Code or an Opt-In Interest Area Code is set up in Personify360, it becomes available for use in Thrive Marketing Professional.
Adding Interests
To a Form
An interest is a way to organize subscribers into groups in Thrive Marketing Professional. For example, you frequently use interests to denote subscription preferences for your subscribers. These are found on a subscription management web form allowing them to opt-in to one type of email communication or another.
Interests are also useful tools for creating specific mailing groups for other items as well. These include people to invite to an event, people that purchased a specific product, or perhaps people with a certain status.
NOTE: A corresponding target group is automatically created along with each interest. This makes it easy to use the interest as the basis for a target group in a mailing.
Personify360 interests can be added to a Data Input form. Let's learn how.
To a Data Input Form
- You'll need to begin by creating a Data Input Form. To do so, navigate to Subscribers > Forms > Data Input Forms.
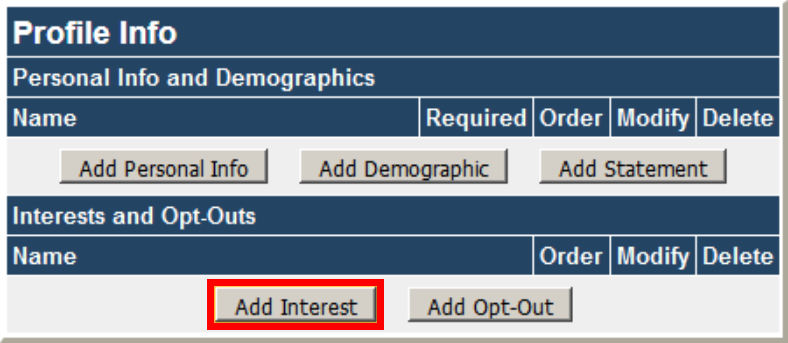
- Identify your desired form, and click the Profile Info icon.
![]()
- Click Add Interest.
- Click the Interests menu and select the desired Interest.
- Enter the ordinal position (first, second, third, etc.) in the Order field.

- Click Update. The interest will appear on the form in the designated position.
Auto-Subscribe Interests
You can also add auto-subscribe interests to a form:
- Click Add Input Form (alternatively, click the Modify icon).
- To add interests, scroll down to the Interests heading.
- Click Add. A new window opens with several interest options, including the Personify360 interests.
- Select the desired interest and click Add Interest. Repeat this process for each interest you wish to add to the form.
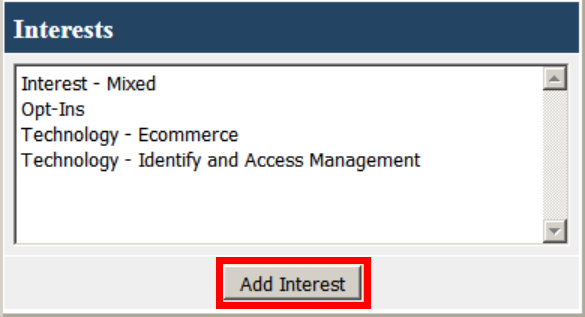
- These interests will appear as auto-subscribe interests (they are automatically selected when subscribers complete the form).
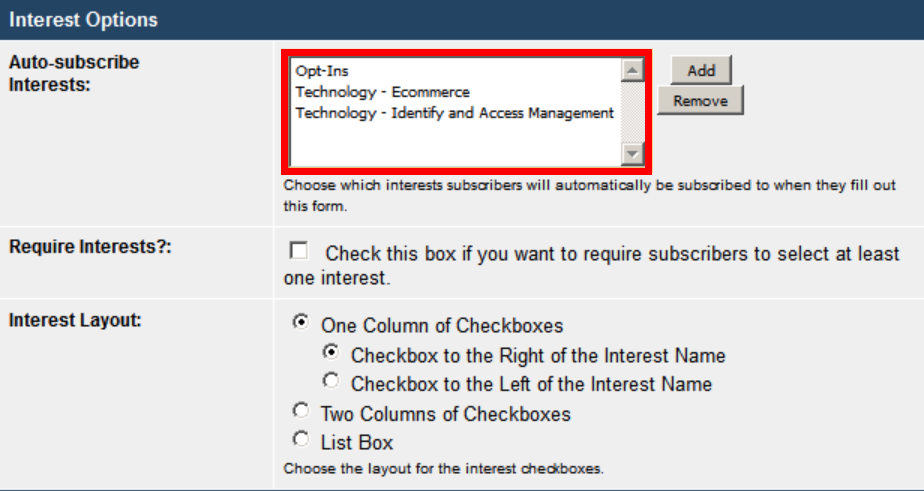
- Complete the form and click Update when finished.
Creating Interests
Personify360 IPM Interests can be created in the Demographic area or Opt-in Interest area. Because Thrive Marketing Professional works with both, it's up to you to decide where you want to establish these interests.
Demographic Interests
The following steps walk through the process to create interests in the Personify360 Demographic area:
- Navigate to System Admin > System Codes > System Types and Codes.
- In the Subsystem menu, select CUS - Customer Subsystem.
- Click Search.
- Double-click Demographic in the Type column.

- Click Edit Codes in the left panel (located under Code Types).
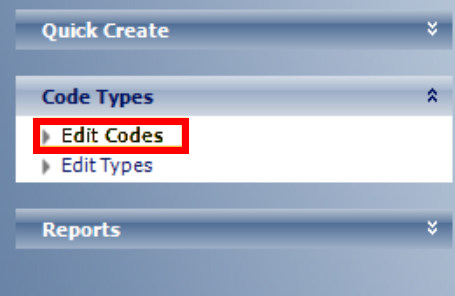
- Click Add Code under the Type Information area.
- Enter content into the Code (24 character limit) and Description (50 character limit) fields under Code Detail on the right. The content input into the Description field will appear as the Personify360 Interest name in Thrive Marketing Professional.
- Check the Active and Available to Web boxes.
- Click the Floppy Disk icon in the top right to save.
- Click the code that was just added to open it in the Code Detail window (the newest code will appear at the bottom of the list). Click Edit Subcodes for this Code.
- Click Add Subcode.
- Enter content into the Sub-Code (24 character limit) and Description (50 character limit) fields under Subcode Detail on the right. The content in the Description field appears as the Interest Name in Thrive Marketing Professional (to the right of the Code Description above).
- Check the Active and Available to Web boxes.
- Click the Floppy Disk icon in the top right to save.
NOTE: If you receive an error message, click the blank sub-code and then click Delete Subcode and save again.
Opt-In Interests
- Navigate to System Admin > System Codes > System Types and Codes.
- In the Subsystem menu, select CUS - Customer Subsystem.
- Click Search.
- Double-click Opt-In_Interest_Area in the Type column.
- Click Edit Codes in the left panel (located under Code Types).
- Click Add Code under the Type Information area.
- Enter content into the Code (24 character limit) and Description (50 character limit) fields under Code Detail on the right. The content input into the Description field will appear as the Personify360 Interest name in Thrive Marketing Professional.
- Check the Active and Available to Web boxes.
- Click the Floppy Disk icon in the top right to save.
Result
With a well thought out classification scheme, you will have a more granular insights into your customer records. Using this within the IPM feature lets you tailor the preferences of your subscribers to a variety of content themes.
Manage Personify360 Interests in Thrive Marketing Professional
When you've set up your Opt-In and Demographic Interests in Personify360, Thrive Marketing Professional pulls these interests into its database. There is a small amount of initial work that your Thrive Marketing Professional Admin must complete to make these interests available. Once available, you can immediately begin to use these interests to personalize your mailings and content and to create target groups.
Select a Personify360 Interest
NOTE: Anyone with Administrator permissions can perform the following steps.
- Navigate to Subscribers > Profile Fields.
- Click the Folder menu and select Integration Interests.
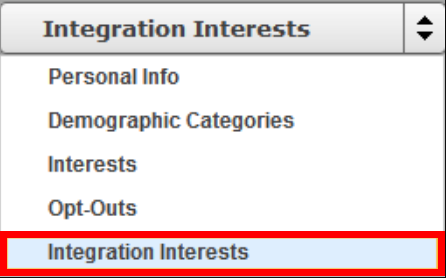
- The list of Personify360 Interests displays. Click Manage Integration Interests to open the Manage Personify360 Interests pop-up.

- You will see a complete list of available Personify360 interests. You can make an interest available in Thrive Marketing Professional by checking it or remove it from Thrive Marketing Professional by unchecking it.
- Click Refresh to refresh the list of interests. Click Save to save any changes.
Rename a Personify360 Interest
You can create a display name for a Personify360 interest in Thrive Marketing Professional. A display name is most often different than the interest name in Personify360. It is a Thrive Marketing Professional-only name that is generally used to help subscribers understand the what they are updating when changing their preferences.
- Navigate to Subscribers > Profile Fields.
- Click the interest you wish to modify. This will open the Edit Integration Interest pop-up.
- Enter a display name in the Name field.
- Click Save.
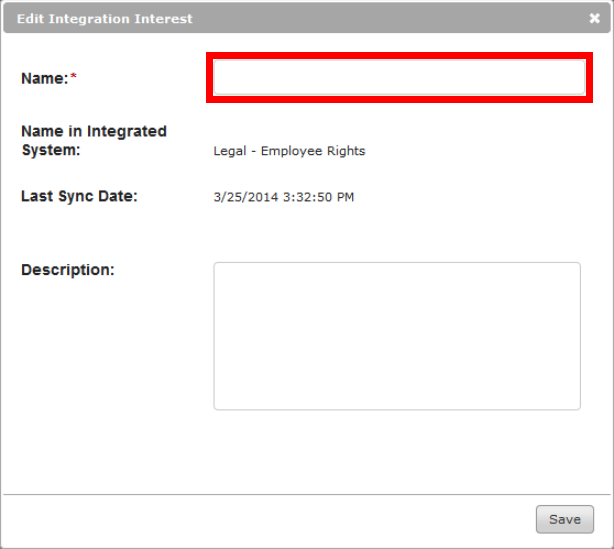
NOTE: If you rename a Personify360 interest in Thrive Marketing Professional, the Profile Fields page still displays the original name from Personify360.
Test a Landing Page for IPM
When you test a landing page for IPM, it's important that you test to an existing record in the host AMS database so that you can confirm that the landing page is picking up the subscriber data in the database. To do this:
- Insert a link to the IPM landing page in a template.
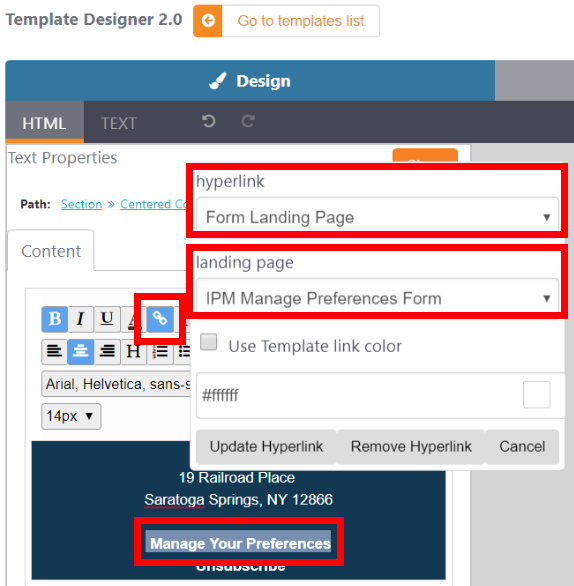
- Create a message using that template.
- Send a test message to an existing database record.
- Have the test recipient click on the link for the landing page form, and then compete and submit the form.
- Check the host AMS database to ensure that the selections were applied to the test recipient's record.