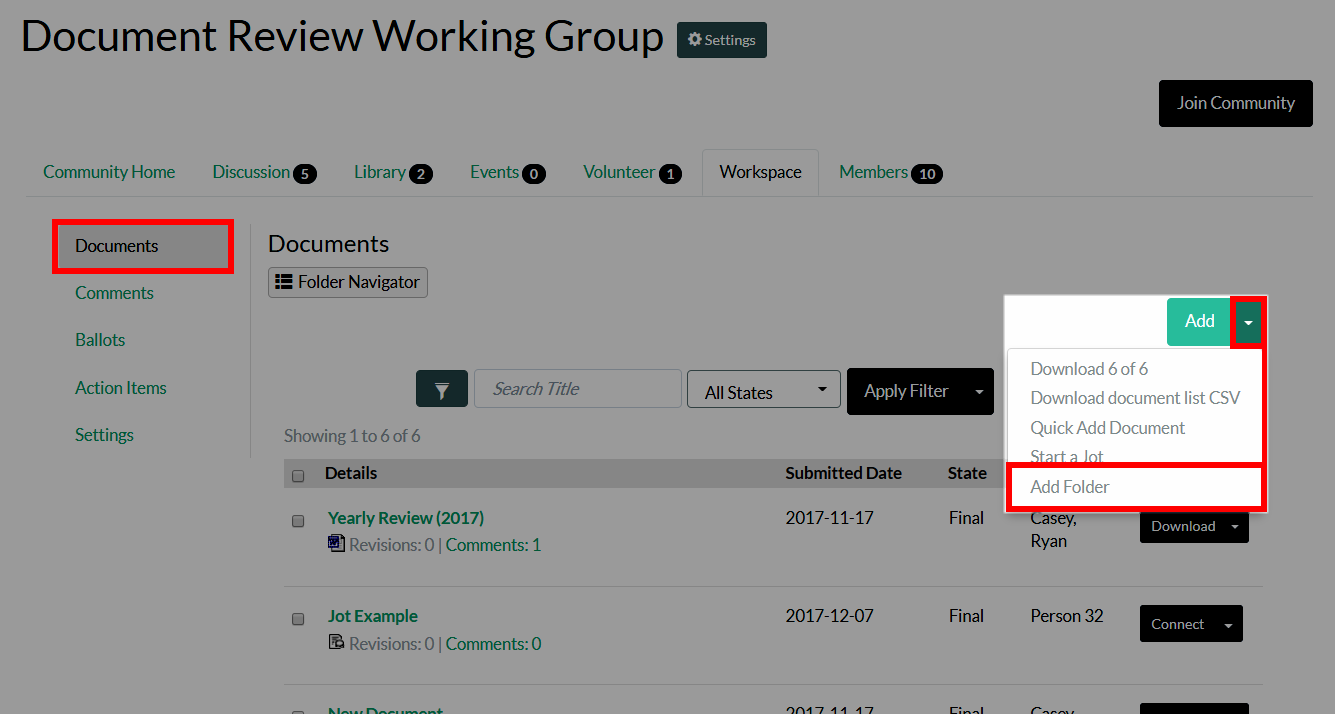
You can create as many folders as you need to keep your various documents organized by type or subject matter.
Create a Folder
To do so, navigate to the Documents tab and:
- Click the Actions menu.
- Select Add Folder.

- Complete the form to configure your new folder.
Options
| Field | Description |
|---|---|
| Details | |
| Folder Name | Give your folder a descriptive name that makes sense for the types of documents it will contain (e.g., Meeting Notes). |
| Default Folder? | Check this box to make this the default folder for all new documents (i.e., whenever someone adds a document, this will be the selected folder, by default). |
| Folder Description | An optional description providing guidance as to why this folder exists and when it should be used. |
| Folder Placement | Use the first menu to make this a top-level folder or place it within an existing folder. Use the second menu to determine this folder's hierarchical placement (only applicable if a top-level folder or placed within an existing folder that has sub-folders). |
| Upload Permissions | Set the folder's upload permissions to allow:
|
| Comment Permissions |
Here, you can set the folder's default comment permissions for who can ADD and VIEW comments on documents added to this folder. Set the default for who is allowed to ADD comments to:
|
| Auto Naming | |
| Auto Naming |
|
- Click Add New Folder at the bottom of the page to create your new folder.