As anyone with experience managing large conferences knows, things move at a blistering pace and changes can happen on a daily basis. In this article, you'll learn how to remove live and recorded sessions from a track, so you'll be equipped to handle any session cancellations that may occur for your event.
Delete a live session
- In the Admin Toolbar, click Admin.

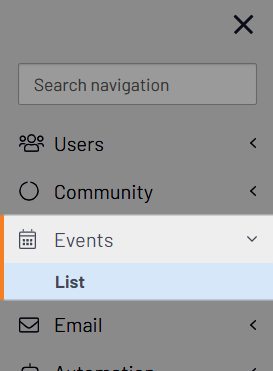
- Navigate to Events > List.
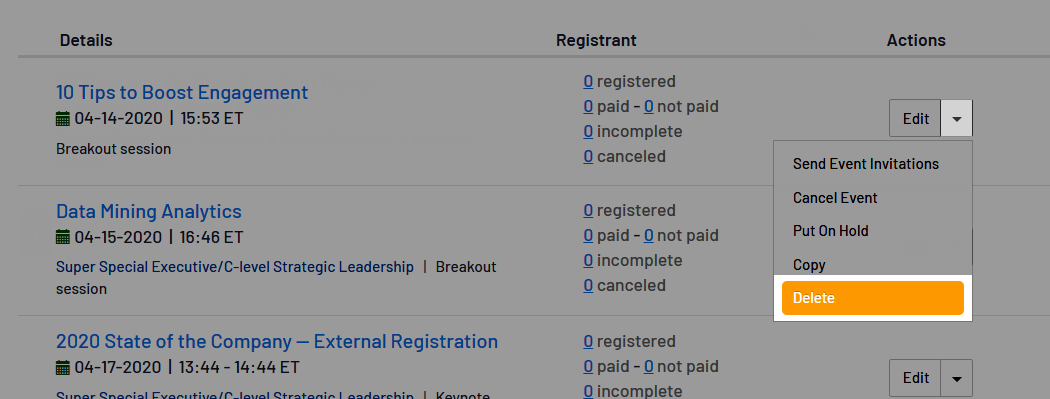
- All of your event's live sessions are listed on this page. Click the down arrow for the live session you want to remove and select Delete.
- Click Delete in the confirmation pop-up to remove the session.
Remove a recorded session
While the deletion of live sessions is accomplished in the Admin interface, you'll delete recorded sessions (both embedded and external) from their associated track.
- Navigate to Tracks > All Tracks in the top navigation
- Click a track title to view its home page.
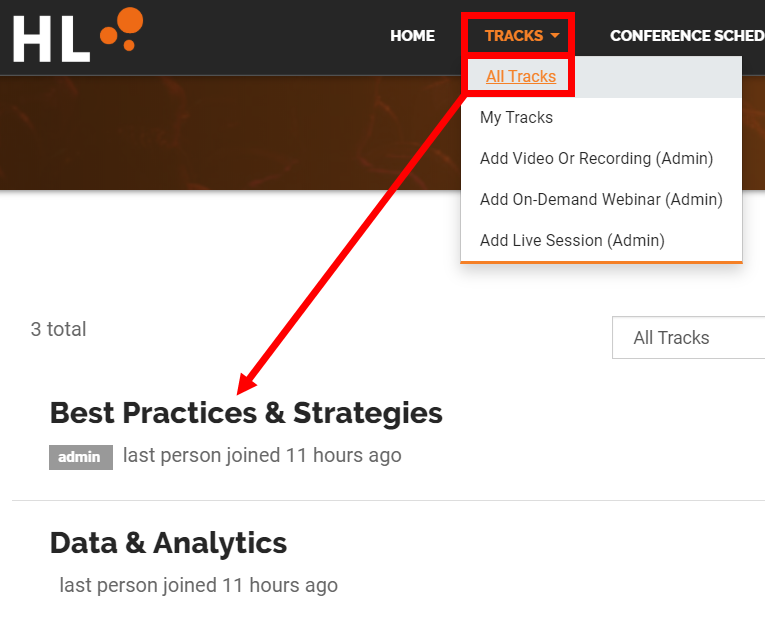
TIP: If there are a lot of tracks, use the menus above the list to filter the displayed tracks.
- Click the RECORDED SESSIONS & RESOURCES tab.
- Click a session title to view its home page.
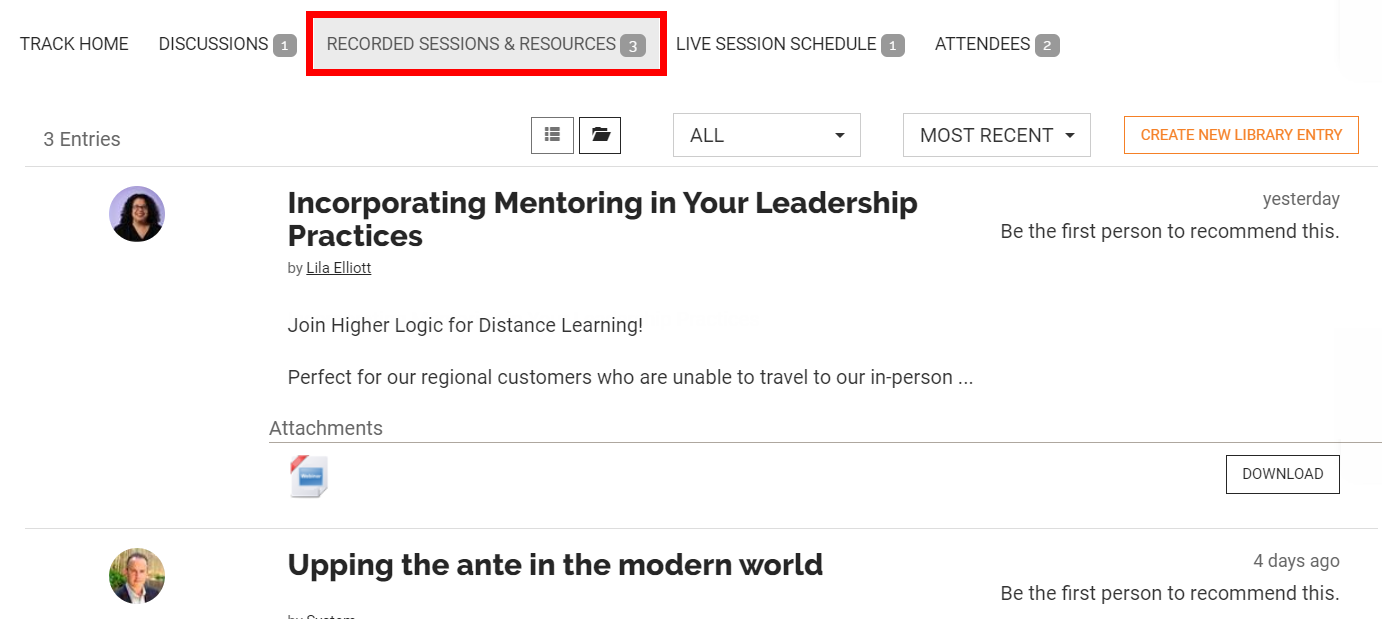
TIP: If there are a lot of sessions, use the following two menus above the list to sort/filter them: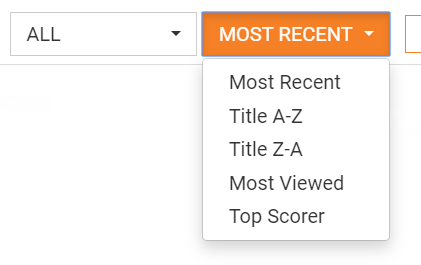
- Click the ACTIONS menu on the right side of the page and select Delete.
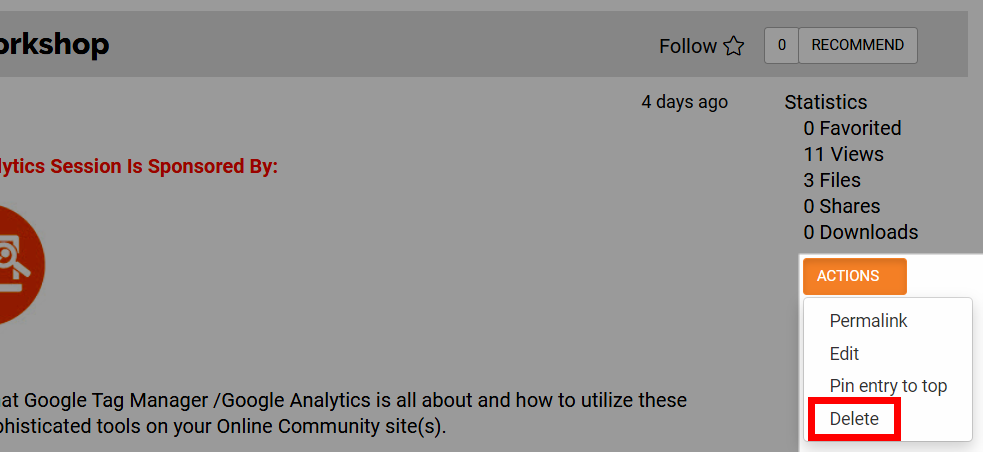
- Click Yes in the confirmation pop-up to remove the session.
WARNING: This action cannot be undone! ALL of the session's information and uploaded videos/resources are removed.