Your Community Essentials site features a Topic Community; in this type of community, all content, upon creation, must be flagged with unique Topic Tags (created by Super Admins). This ensures all content belongs to organizational-approved categories, which, in turn, makes all Topic Community content easily searchable and consumable by members interested in specific topics.
How it works
A Topic Community works in two ways:
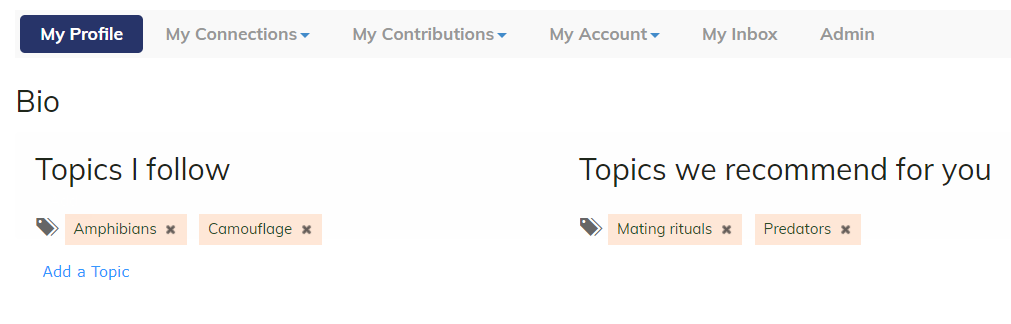
- From your profile, you can manually select any of the Topic Tags your association has curated as your Topics I follow. This is the most direct way to ensure you receive the content you're most interested in.
- Second, as you interact across your community, the system performs calculations based on your actions to automatically promote content you're interested in. These are shown on your profile as the Topics we recommend for you.
NOTE: These actions include things like reading, favoriting, recommending, and commenting on content.
All of this content is then automatically curated and included in your community's notification emails (if you've elected to receive them).
How to manage your Topics
Add tags
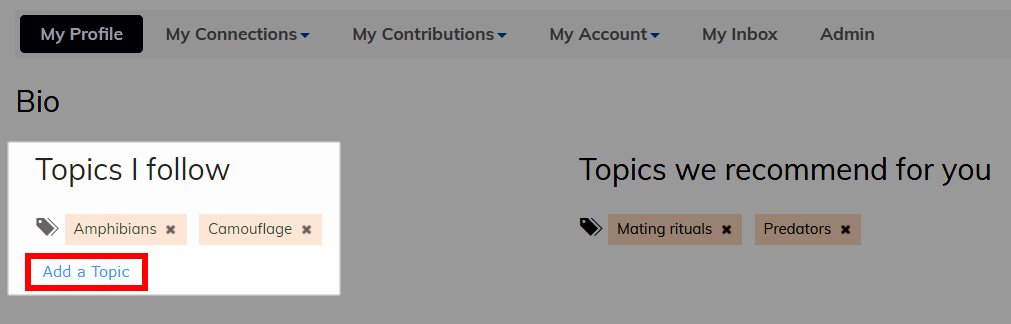
- Navigate to your profile > My Profile tab.
- In the Topics I follow area, click Add a Topic and select the desired tag(s).
NOTE: You'll only be able to choose tags that have been created by your administrator(s).
Remove Tags
Simply click the X to the right of the tag.
NOTE: Even though the system will automatically add Topic Tags in the Topics we recommend for you area, you're free to remove them if they don't align with your interests.
How to manage your Topic Notification email
- Navigate to your profile.
- Click My Account > Community Notifications.
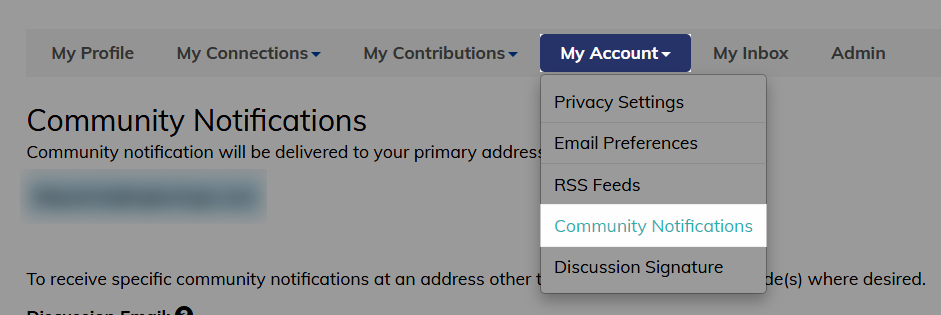
- In the Topic Notifications area, select the desired Email Delivery option:
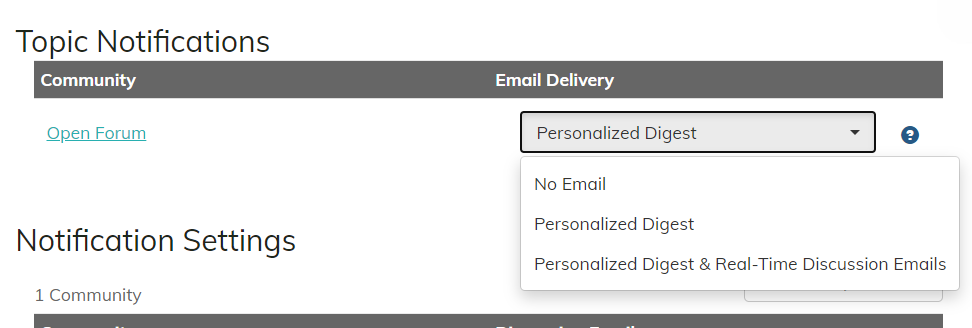
- No Email - You won't receive any notifications.
- Personalized Digest - A daily email summarizing all content relevant to your preferences, interests, and activity.
- Personalized Digest & Real-Time Discussion Emails - In addition to receiving the Summary email at the end of the day, you'll also immediately be notified about new discussion threads/messages related to your chosen Topic Tags (you can configure your tags from your profile). NOTE: Choosing this option will exclude discussion activity from the Summary email so you’re not presented the same information twice.
How to manage a Topic Community's curated content
NOTE: Only Super Admins can perform this task.
You can manage the algorithm used to curate content to your users at any time:
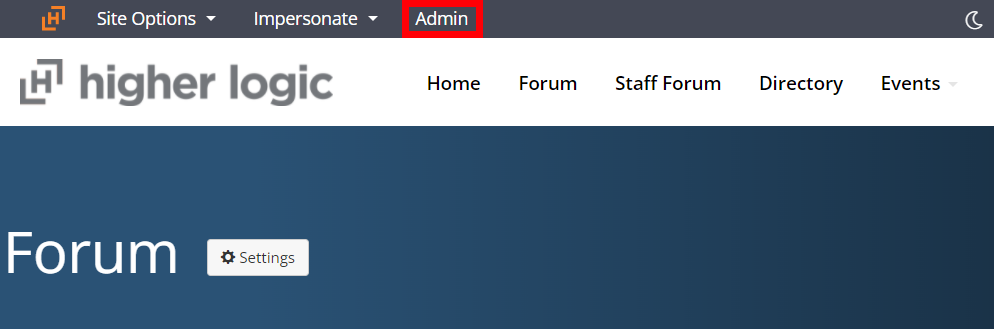
- In the Admin Toolbar, click Admin.
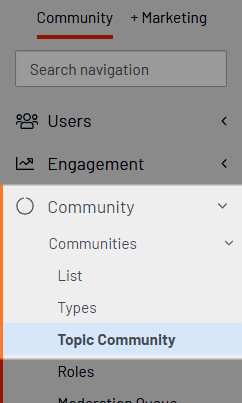
- Navigate to Community > Communities > Topic Community.
- Topic Community content is delivered to users via a notification email. At this point, you need to tailor what kind of content should appear in these emails. Toggle each option to YES or NO to control whether it's included.
NOTE: Personal Content is prioritized in these emails, as it's more relevant to users. However, if there isn't enough Personal Content, Popular Content will be added in so that users always receive new and interesting content.
| Field | Description |
|---|---|
| Personal Content This refers to content specific to a user's selected Stated Interests and activity in the Topic Community. |
|
| Interacted | Content a user has directly contributed or interacted with by recommending, favoriting, or commenting on. |
| Boosted | Content Community and/or Super Admins have boosted. |
| Stated Interests |
Content tagged as a user's Stated Interest (i.e., Topics I follow). NOTE: A Topics I follow area is available on all member profiles. In this area, they can select any of the Topic Tags you or other Super Admins have created, giving them the most direct control over what content they're interested in consuming. |
| Observed Interests | As members interact across the Topic Community, the system performs calculations based on their actions to automatically promote content. These are shown on their profile in the Topics we recommend for you area. If set to Yes, this content is included in the Topic Community notification emails. |
| Popular Content This refers to the most popular content in the Topic Community. You can also set the maximum number of Popular Content items to include in the digest emails using the option at the bottom of this area. This is a helpful way to limit Popular Content, if desired. |
|
| Most Read | The content most read by users. |
| Most Recommended | The content most recommended by users. |
| Most Favorited | The content most favorited by users. |
| Random | This is a safety net that adds random content if a user doesn't qualify for the minimum threshold. |
How to create Topic Tags
NOTE: Only Super Admins can perform this task.
Users are required to tag all content they contribute to the Topic Community with specific Topic Tags, making them the driving force of Topic Community content. Because of their importance, creating Topic Tags is a crucial step when setting up this functionality, so take the time to properly plan and brainstorm; if available, you may want to consult your community managers to ensure an appropriate and relevant set of tags is created.
Step 1 - Create Tag Groups
Topic Tags are organized and created within Tag Groups, much like how files are organized and stored in folders. So, the first thing you need to do is create your desired Tag Group(s). To do so:
- In the Admin Toolbar, click Admin.
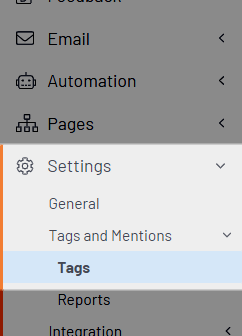
- Navigate to Settings > Tags and Mentions > Tags.
- Click Add.
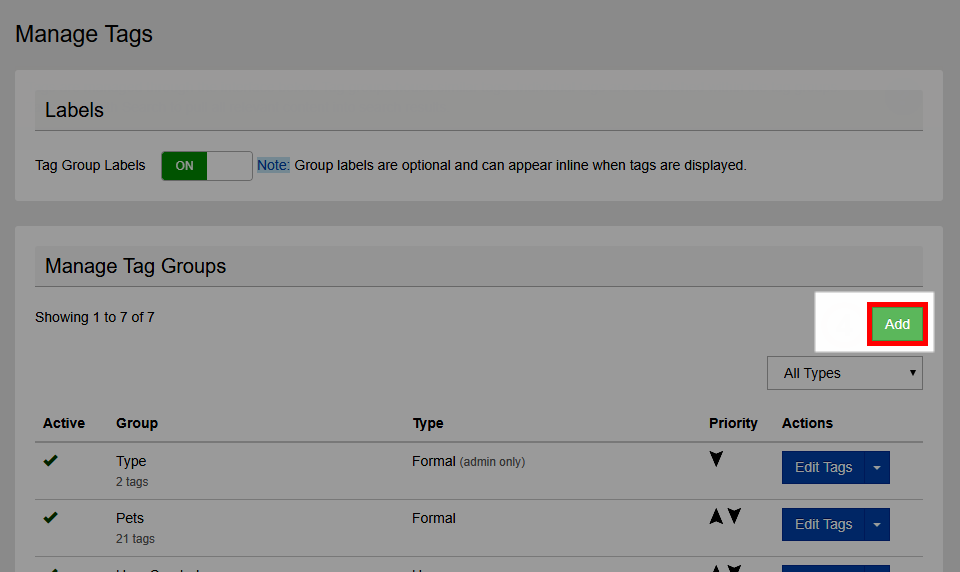
- Complete the fields below and click Save to create your Tag Group.
| Field | Description |
|---|---|
| Tag Group Name | Give your new Tag Group a name fitting for the types of tags it'll contain. |
| Admin Only | Decide whether only admins can apply tags from this Tag Group. If set to No, your users can apply these tags as well. |
| Is Active |
Controls whether the Tag Group is active or inactive:
NOTE: Making a Tag Group inactive has no impact on tags currently in use, only the prevention of further tagging. |
| Tag Group Type |
Because you're creating Topic Tags, select the Topic Only or Formal and Topic option, depending on your needs. NOTE: You can learn more about Formal tags on the Tags page. |
- Continue creating as many Tag Groups as necessary for your needs, and then move on to Step 2.
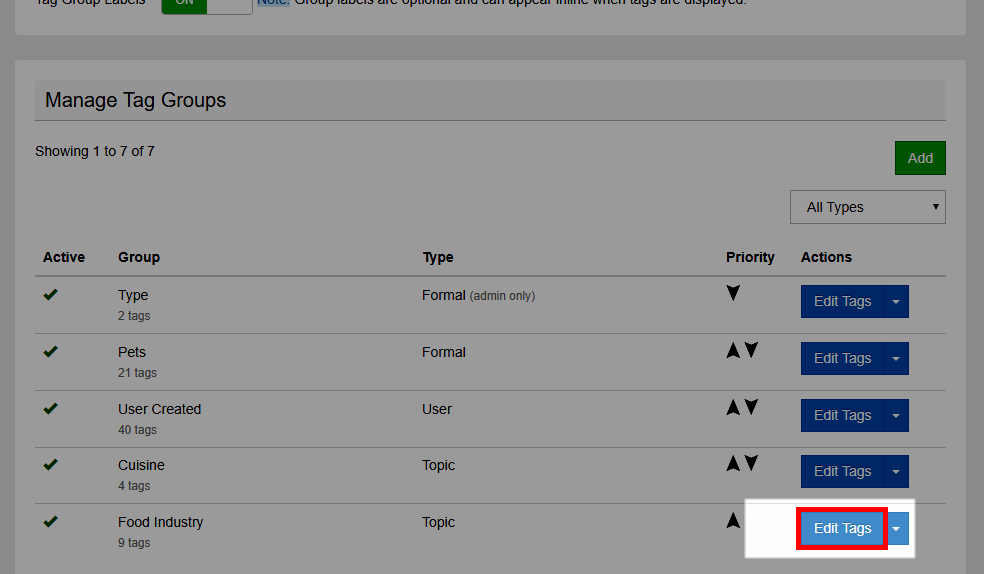
Step 2 - Create Topic Tags
Now that your Tag Group(s) are created, it's time to add Topic Tags. To do so:
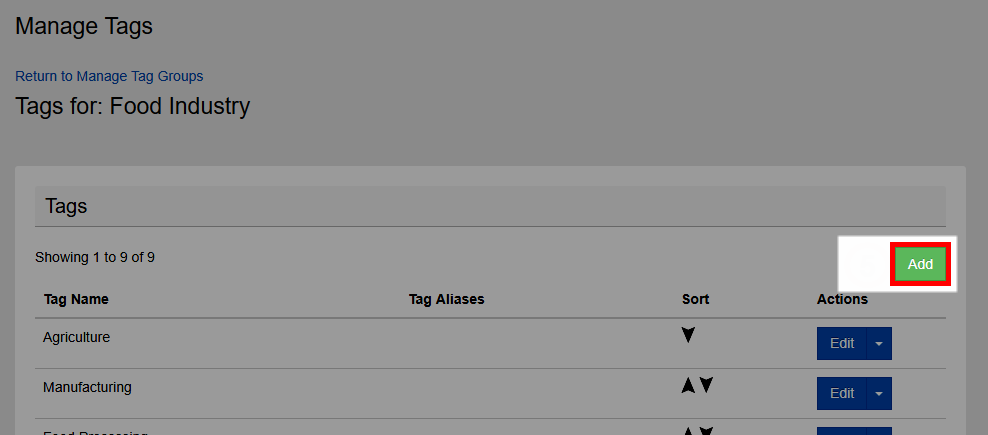
- Back on the Settings > Tags and Mentions > Tags page, click the desired Tag Group's Edit Tags button (this enables you to edit, delete, and create tags).
- To create a new tag, click Add and complete the following options:
| Field | Description |
|---|---|
| Tag Name | Provide a keyword or term that accurately describes the types of content the tag is applicable to. Tag names help organize and describe content across your site, making it easier for your users to search for and find it. |
| Tag Aliases |
Here, you can enter any keywords or terms that should be considered the same as the tag. This serves two purposes:
For example, if you create the Topic Tag "EngagementStrategy" and create aliases for "engagement" and "gamification," a user searching either of these two aliases will return "EngagementStrategy" content instead. |
- Continue creating as many Topic Tags as necessary for your needs.
All of these tags are now available for your members to choose when creating content.
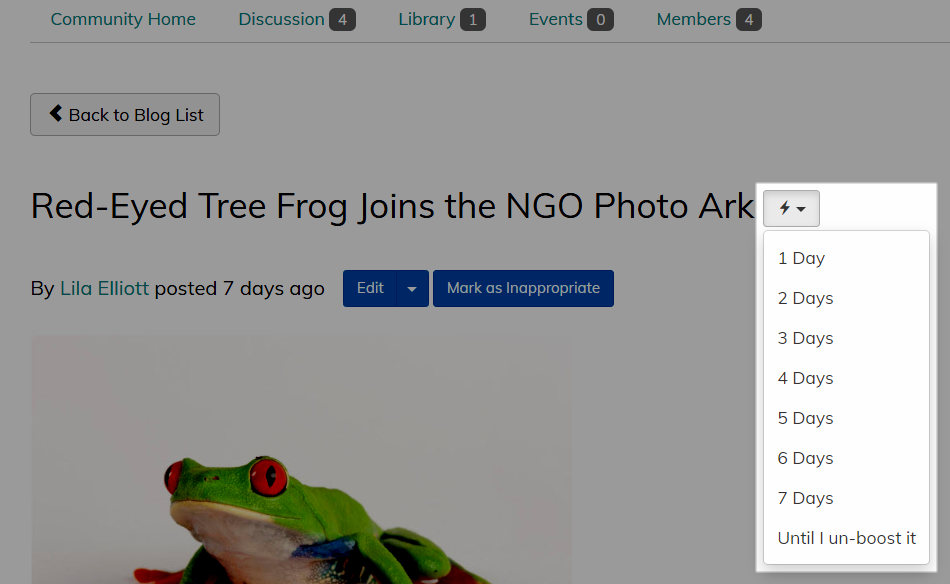
How to Boost content
Community and Super Admins can manually Boost any existing content in the Topic Community at any time, forcing it to appear in a user's Topic Community notification email.
Boosting enables admins to spotlight specific content. To Boost announcements, blog articles, library files, discussion posts, events, and volunteer opportunities, simply navigate to the content in question and select the desired time frame from the Boost For: menu. Content can be Boosted anywhere from 1—7 days to indefinitely.
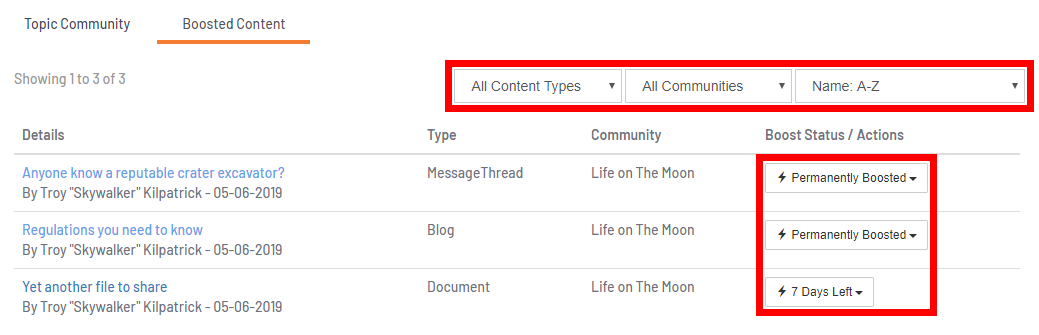
Manage all boosted content
If you need to manage your Boosted content, you can do so from a single page rather than having to navigate to each piece of content individually.
Admins can view and manage all Boosted content from the Admin interface:
- In the Admin Toolbar, click Admin.
- Navigate to Community > Communities > Topic Community.
- Click the Boosted Content tab.
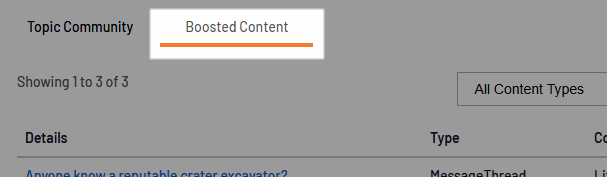
- You can use the filter menus at the top to easily find specific boosted content, and use the menus on the right to change their boosted time period.