
A Content Security Policy (CSP) is a browser-based security layer that detects and mitigates malicious attacks, such as cross-site scripting (XSS) and code injections. CSP acts as an "allow list" for your site so that only approved sources can add content to your community pages.
NOTE: By default, the only sources that Higher Logic allows are Higher Logic-hosted resources, Google fonts, and embedded YouTube videos.
Access the CSP page
- In the Admin Toolbar, click Admin.

- Navigate to Settings > Security > Content Security Policy.
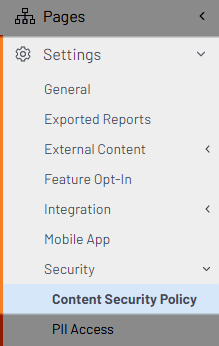
The CSP page has two sections, CSP Setup and Directives, in which Super Admins can:
- enable the CSP and the Reporting mode, and
- manage (add, edit, and remove) account-specific, custom Directives values.
Understand the CSP options
Before setting up your site's CSP, review the information in this section to better understand the implications of the CSP settings.
Reporting mode notes
You enable the Reporting mode by specifying a URL to which CSP violations will be reported.
Your server must be set up to receive the reports.
IMPORTANT: When the Reporting mode is enabled, your CSP is not enforced, but any CSP violations are reported to the URL that is specified.
To understand how the Reporting mode works, assume a scenario in which someone uploads a corrupt image file when the Reporting mode is:
| Your CSP... | The corrupt image file... | |
|---|---|---|
| Enabled | reports the violation to your specified URL | is published on the site |
| Disabled | is automatically in Blocking mode and blocks the content; the violation is reported to the browser console only | is not published on the site; an error message displays where the file insertion was attempted |
NOTE: If a URL is specified, the Reporting mode is enabled.
Configure your CSP
The upper part of the CSP page is where you enable and configure CSP functionality.
- In the Blocking section, check the Block requests in violation of the CSP box to enable CSP.
- In the Report URL section, (optionally) specify the URL to which CSP violations will be reported.
Directives in the CSP
Directives are at the heart of the CSP. There are several types of directives (such as Fetch directives and Navigation directives), and they control and govern various aspects of CSP operations.
The Content Security Policy page in the Admin interface displays the default Higher Logic directives, each of which has values that cannot be changed.
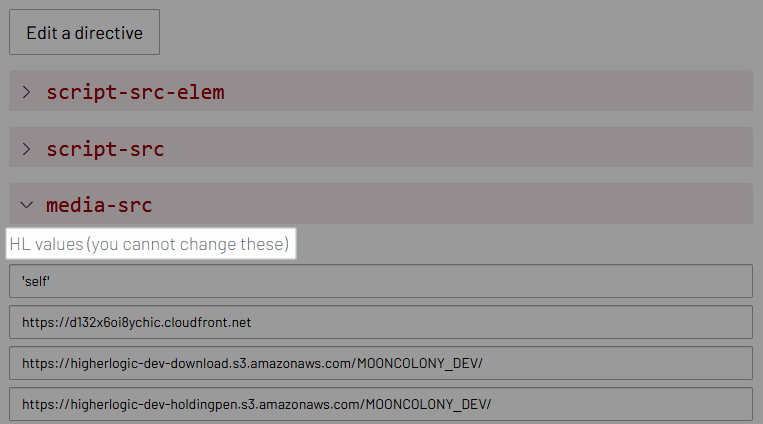
In addition to the default, locked values, you can customize your CSP by editing a directive to add custom values.
Add custom values to your CSP directives
Super Admins can add "custom" values to directives for their CSP. These custom values can be removed and edited, as described in Manage your custom values, below.
- In the Admin Toolbar, click Admin.

- Navigate to Settings > Security > Content Security Policy.

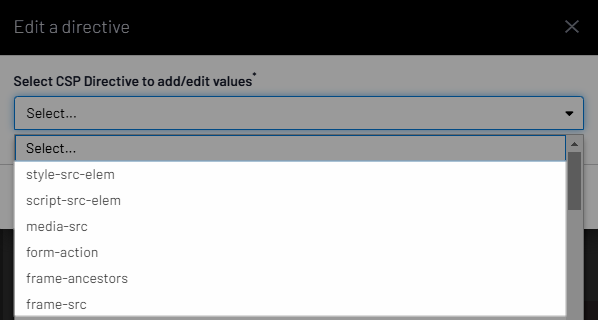
- On the Content Security Policy page, click Edit a directive.
- Click the Select CSP Directive dropdown and choose a directive.
- Click (+) Add under Set CSP Values to add a value.
- In the field, specify a new value to be used by the directive. The system will alert you if you add a value that is either a duplicate of an existing value or already present in the global directives.
IMPORTANT: Make sure that any custom values you add are valid for the directive you're editing.
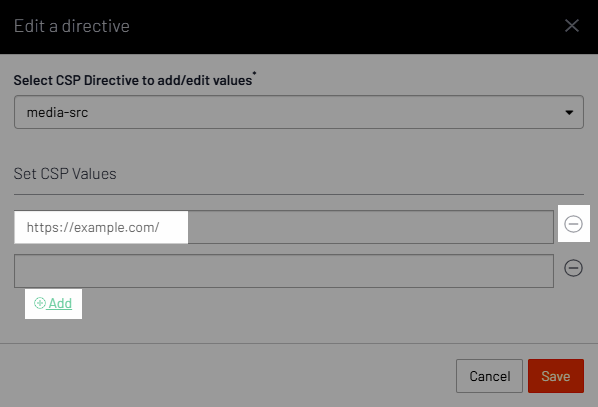
TIP: Click (+) Add again to add another value to this directive; click (-) to remove a value from this directive.
- Click Save. A confirmation message displays.
- Expand the directive you edited and verify that any added values display as expected under Custom values.
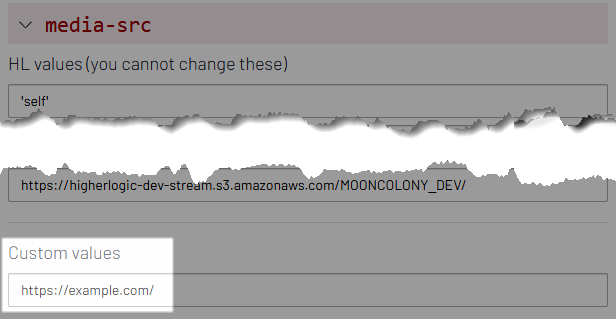
Repeat these steps to add values to other directives.
Manage your custom values
You can manage (edit and remove) any custom value that has been added to your site.
Follow the steps in the previous section to access the Content Security Policy page and edit a directive. On the Edit a directive dialog:
- Edit - simply replace the existing value with the new/updated value that you want.
- Remove - click (-) next to a value to remove it.