In Workspace, a Project's primary purpose is to function as a management tool guiding the document-collaboration process. In many ways, a Project is like a high-level container that houses all of the pertinent resources necessary to achieve the Project's goal(s). These resources include:
- Activities
- Documents
- Ballots
- Action Items
View Project Details & Resources
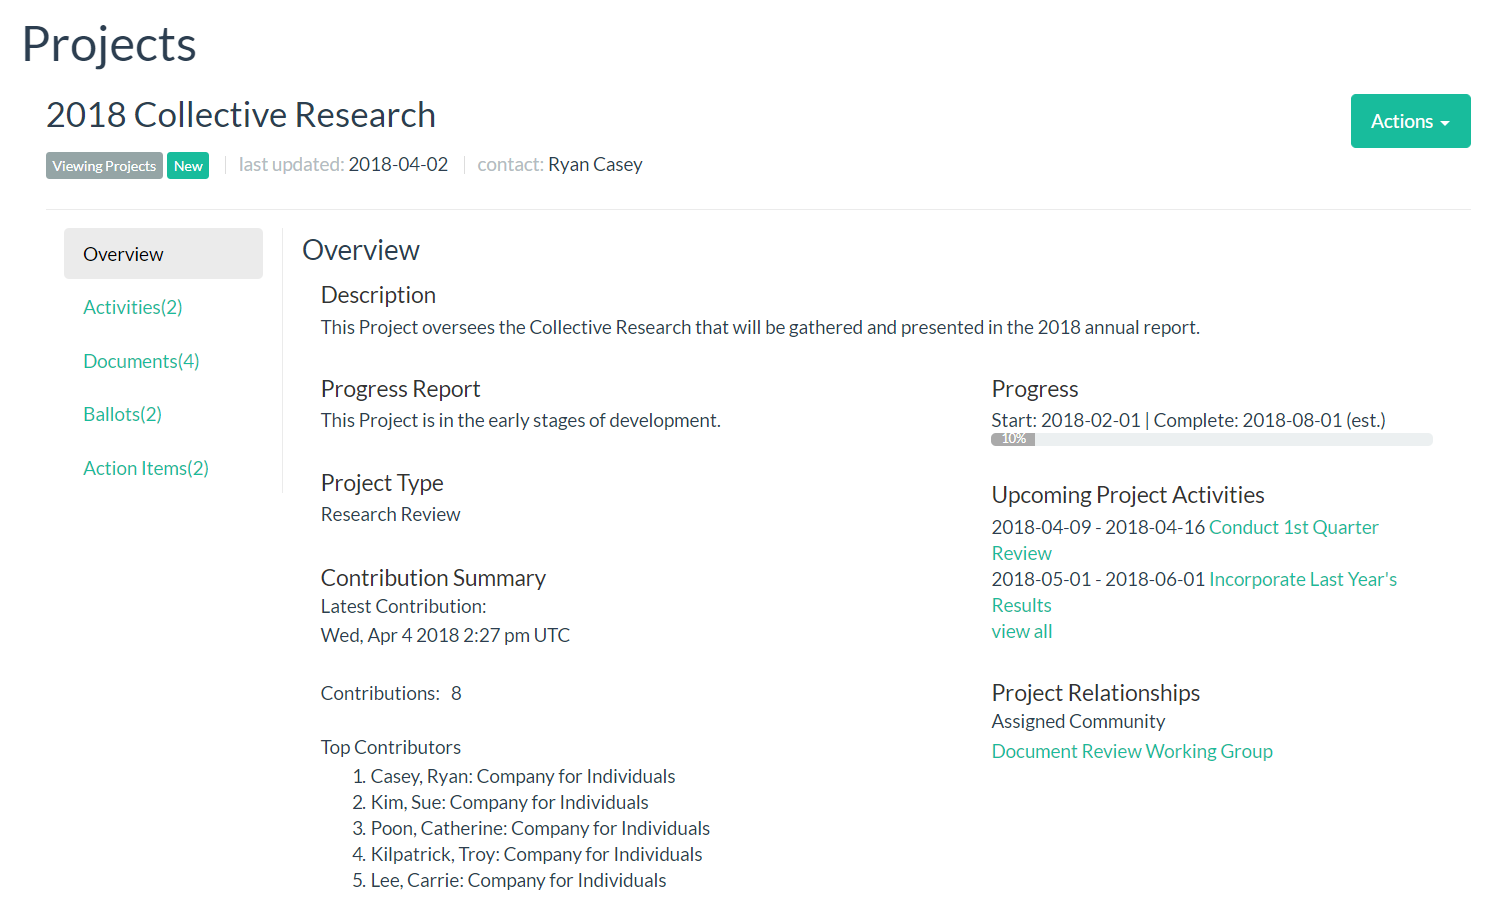
The central hub of a Project is its Overview page, where you can view all of its details and associated resources. If you're managing or contributing to a Project, this is likely where you'll come to stay up to date regarding the Project's overall status and activity.
Access a Project Overview Page
NOTE: Unlike Workspace's other tools, Projects are created and managed outside a community's Workspace: By default, a Project's page is accessible from your Higher Logic Thrive Community (Thrive Community) site's Navigation Bar.
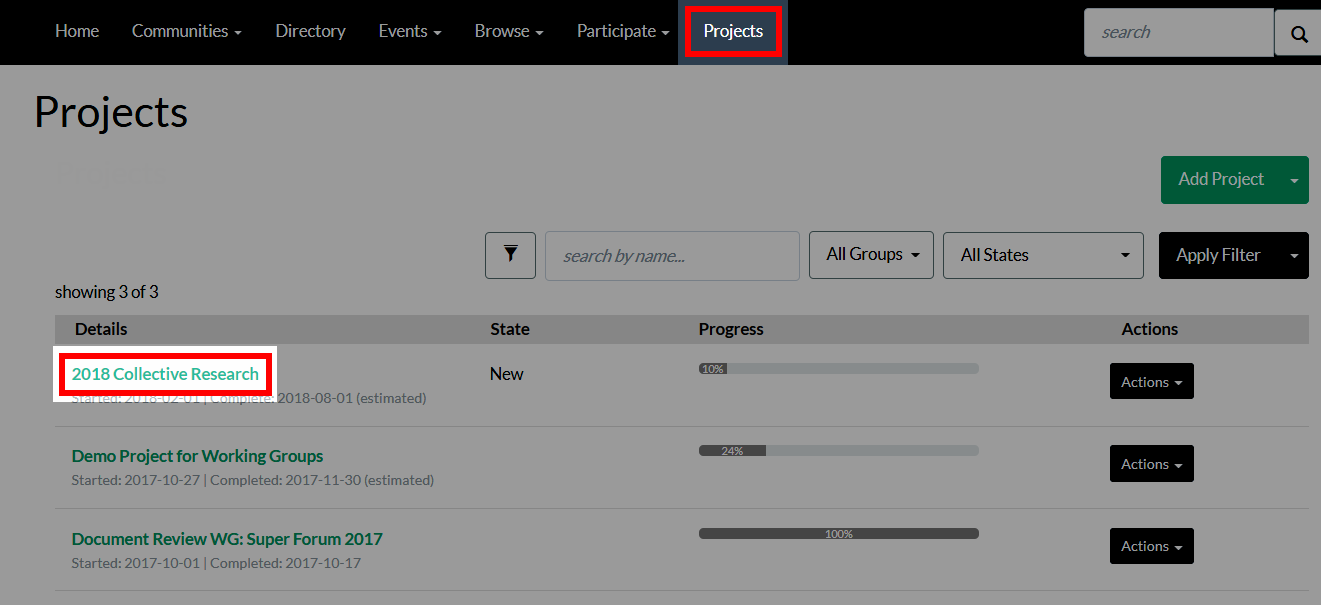
- Click Projects on your Thrive Community site's Navigation Bar.
- Click the title of the Project you want to view.
The left side lists tabs for each of the resources that can be associated to a Project: Activities, documents, ballots, and action items. The number of resources in each category is shown to the right, and you can click these tabs to view them.
The rest of the page displays the Project's details, including its description, progress report, percentage complete (Progress), upcoming activities, and the community Workspace it's assigned to.
Add Resources to a Project
A Project is the container that houses all of the activities, documents, ballots, and/or action items associated to the Project that are necessary to accomplish its goal(s).
Activities
Unlike the other resources, activities can only be added directly from a Project. This is because activities are unique to a Project, and generally represent the primary "to-do list" that must get done to the meet the Project's goal(s). To this end, activities generally reference documents, ballots, and/or action items because they're often the puzzle pieces required to complete them.
To add an activity:
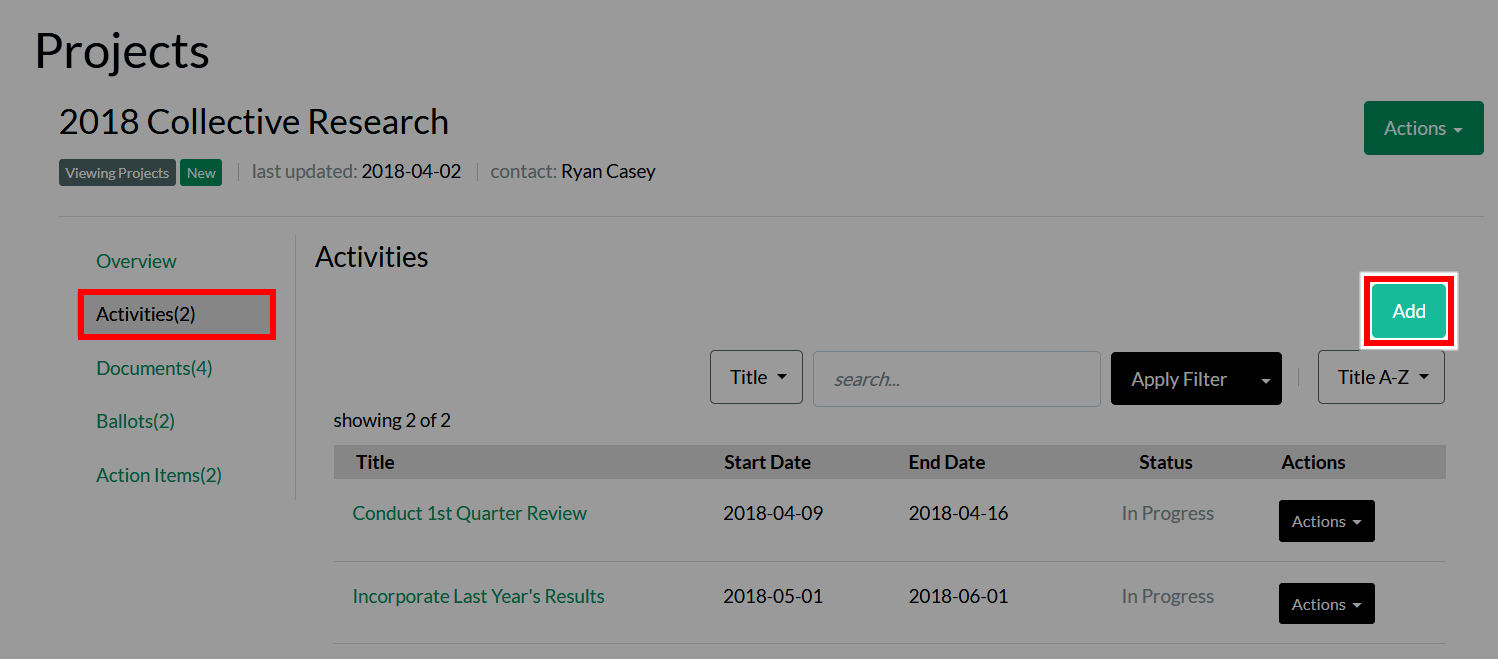
- Click the Activities tab.
- Click Add.
- Complete the form to configure your activity.
Options
| Field | Description |
|---|---|
| Details | |
| Activity Title | Give your activity an appropriate title so it's purpose is clear. |
| Description | Provide a short description of your activity, including any pertinent details important to completing it. |
| Start/End Date | Set the activity's start and end date. These dates are used to organize a Project's activities and provide an overarching time line for when specific tasks should be started and completed. |
| Status | Check this box when the activity has been completed. |
| Resources | |
| Assigned Owners | The "Owner" is the person you want to assign the activity to. To do so, click the menu and begin typing their name. As you type, their name will populate; select it, and then click Add. NOTE: You can assign multiple individuals, and they'll be listed directly below. You can click an Owners associated Remove button to remove them at any time. |
| Referenced Items If there are pertinent documents, ballots, or action items you want to associate to this activity, add them here. |
|
| Reminders Check this box if you want to send a reminder to the chair(s) and members of the Workspace associated to this Project. You can configure the reminder to send X number of days before or after the activity's start date. |
|
| Notifications
NOTE: Use these options to determine who should receive a notification when changes are made to the activity (e.g., its end date was updated, assigned owner(s) changed, etc.). These are one-off change notifications, not ongoing lifecycle notifications. |
|
| Notification Options | From this menu, select who should be notified about activity updates:
|
| CC: | All email addresses listed here will also receive updates about the activity, allowing you to keep individuals other than the project contact and/or group chairs in the loop, if needed. Enter the addresses in a CSV format.
EXAMPLE: sue@myorg.org,bill@myorg.org |
| Submitter Note | If desired, you can include a note in the change notification. These notes are a great way to provide a summary or rationale for the changes made to the activity. |
- Click Save to add your new activity to the Project.
Documents
Documents are unique because you can:
- Upload a new document to a Project directly from the Project
- OR simply associate an existing document to a Project.
Upload a Document
NOTE: This method enables you to quickly upload a document without having to complete the main form. While easier, the downside is you can't include certain document details, like a title, document number, or description, or control other options like assigning a Technical Contact or managing Comment Permissions.
See Upload Documents to learn more about the various ways you can upload a document, and the differences between them.
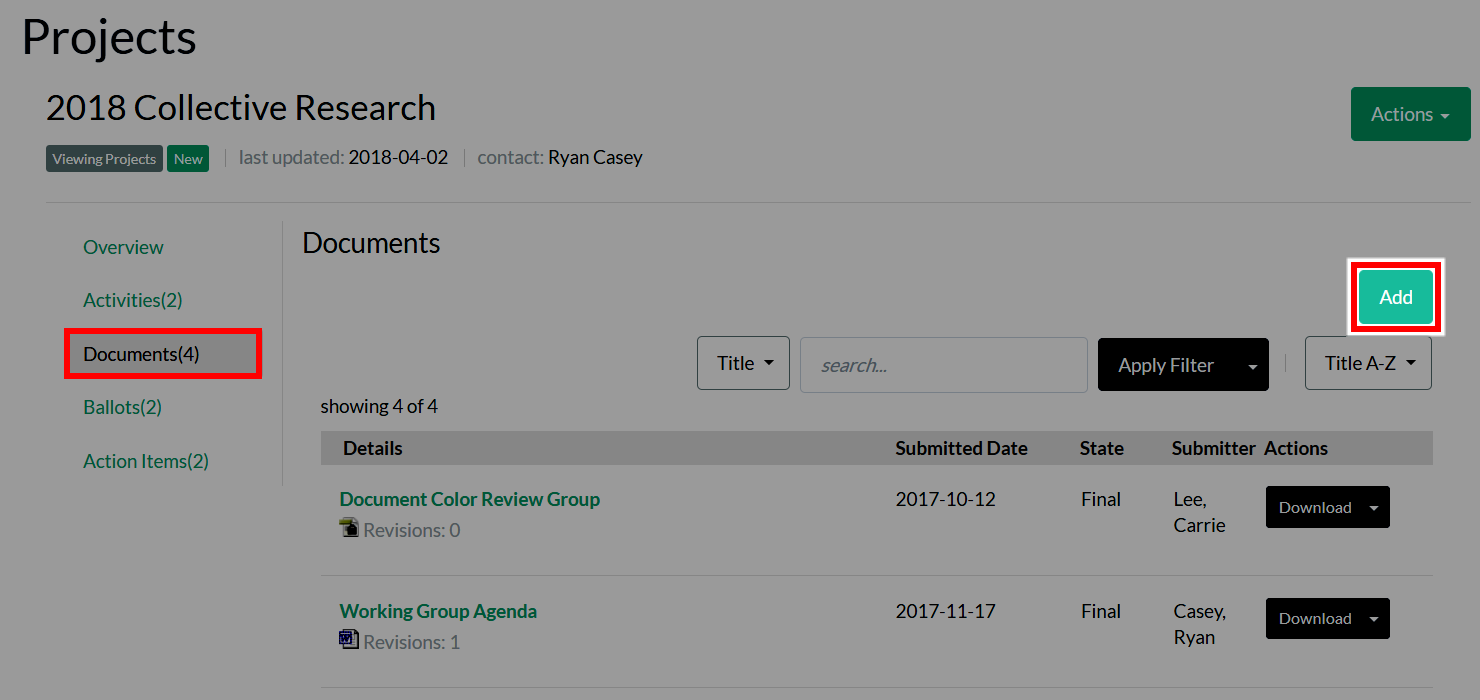
- Click the Documents tab.
- Click Add.
- Configure the options in the resulting pop-up.
- Click Upload to add your new document to the Project.
Associate a Document
From the community Workspace the document you want to associate lives:
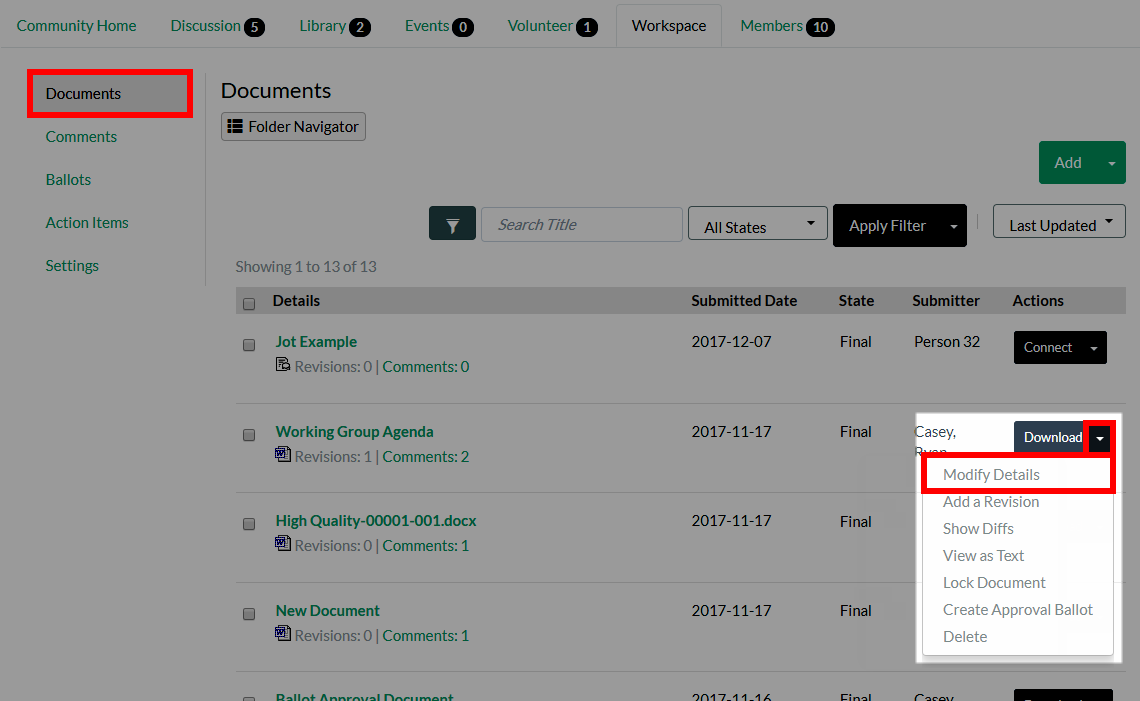
- Click the Documents tab.
- Select Modify Details from the document's Actions menu.
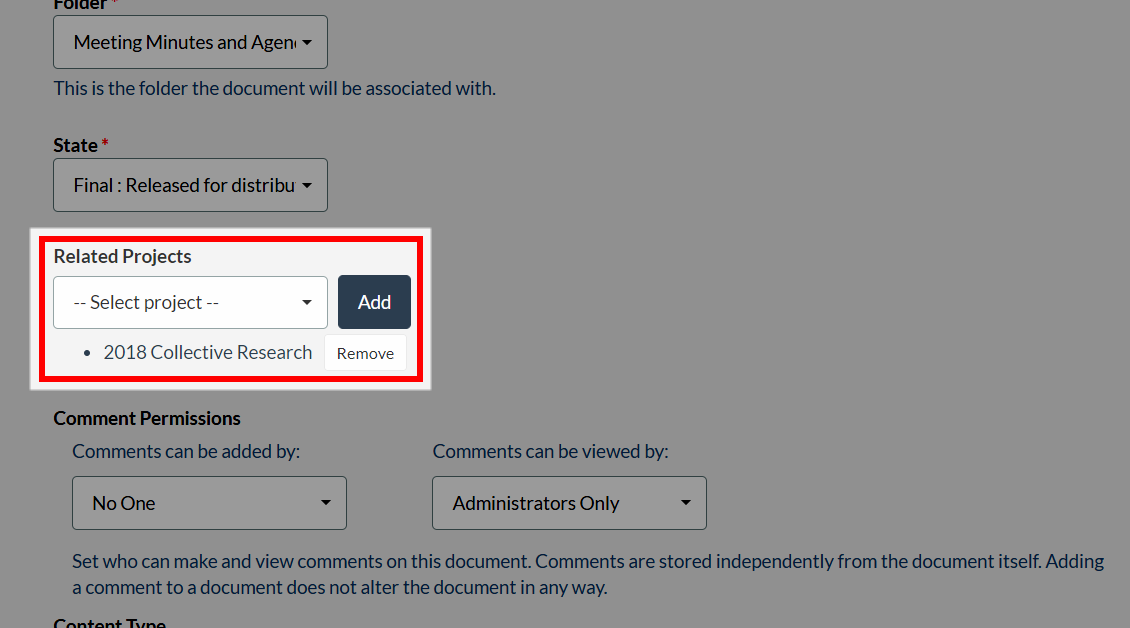
- On the resulting page, scroll down to the Related Projects option. Select the Project to associate the document to, and then click Add.
NOTE: Repeat this step to associate it to multiple Projects.
- If you want to send a notification about this Project update to those who need to know, complete the desired fields in the Notifications area at the bottom of the page.
- Click Submit Changes to associate the document to the Project(s) and, if configured, send the notification to the selected individuals.
Ballots
From the community Workspace the ballot you want to associate lives:
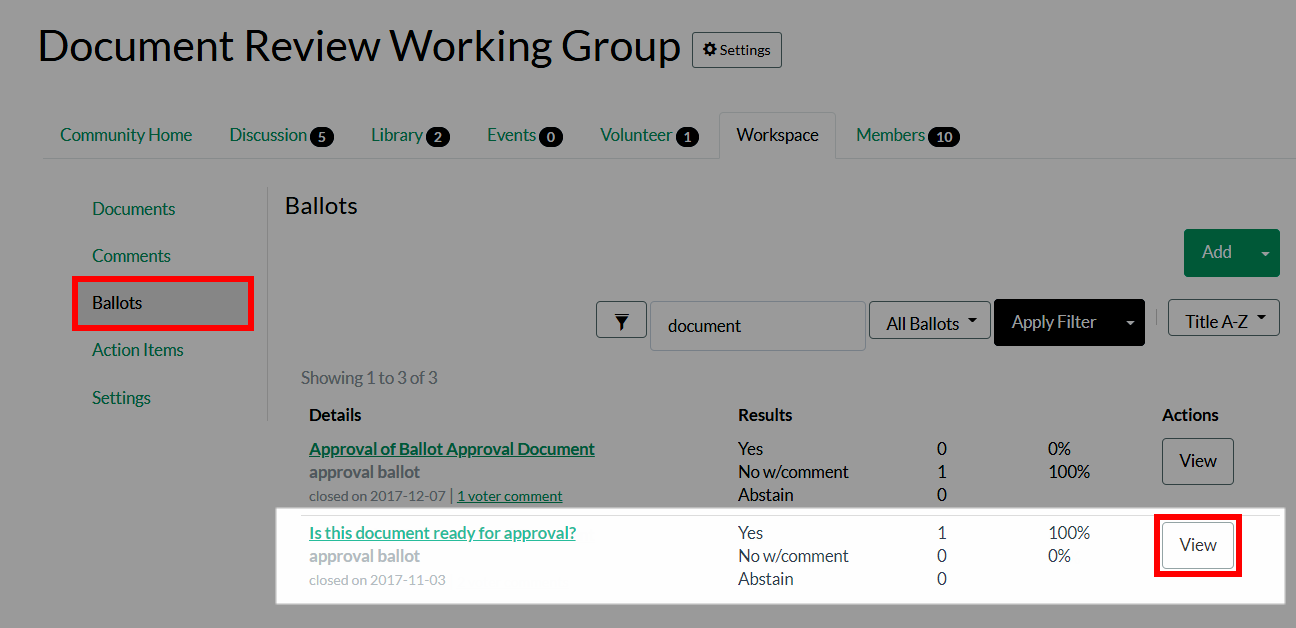
- Click the Ballots tab.
- Click the View button associated to the ballot you want to associate.
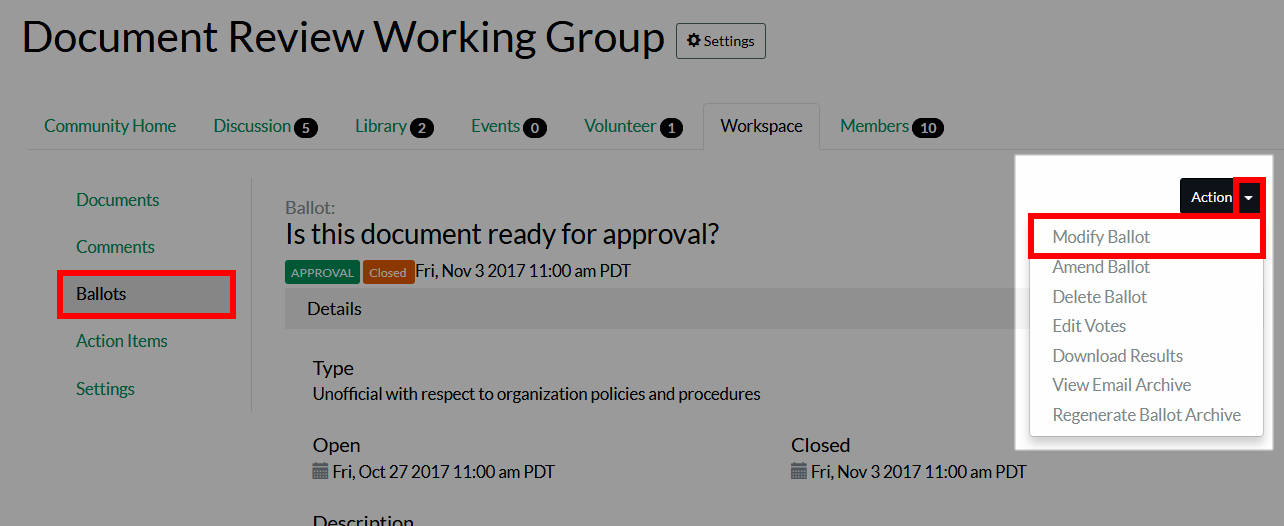
- Select Modify Ballot from the ballot's Actions menu.
- On the resulting page, scroll down to the Related Projects option. Select the Project to associate the ballot to, and then click Add.
NOTE: Repeat this step to associate it to multiple Projects.
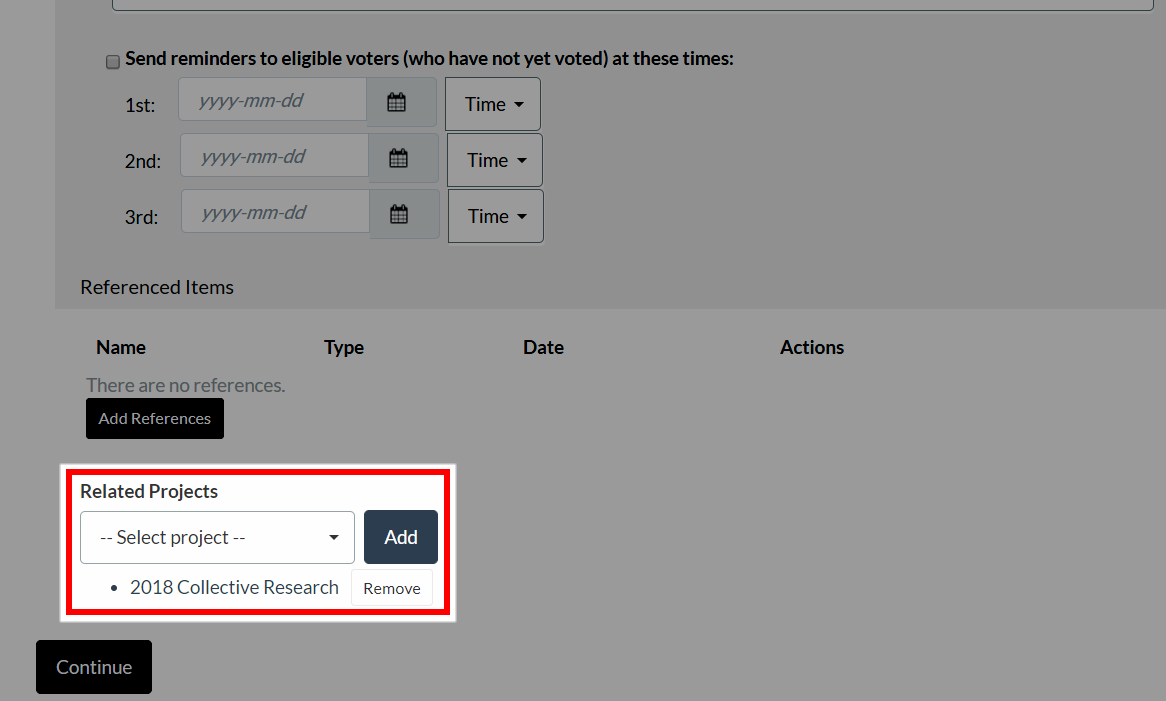
- Click Continue at the bottom of the page.
- Click Accept at the bottom of the resulting page to associate the ballot to the Project(s).
Action Items
From the community Workspace the action item you want to associate lives:
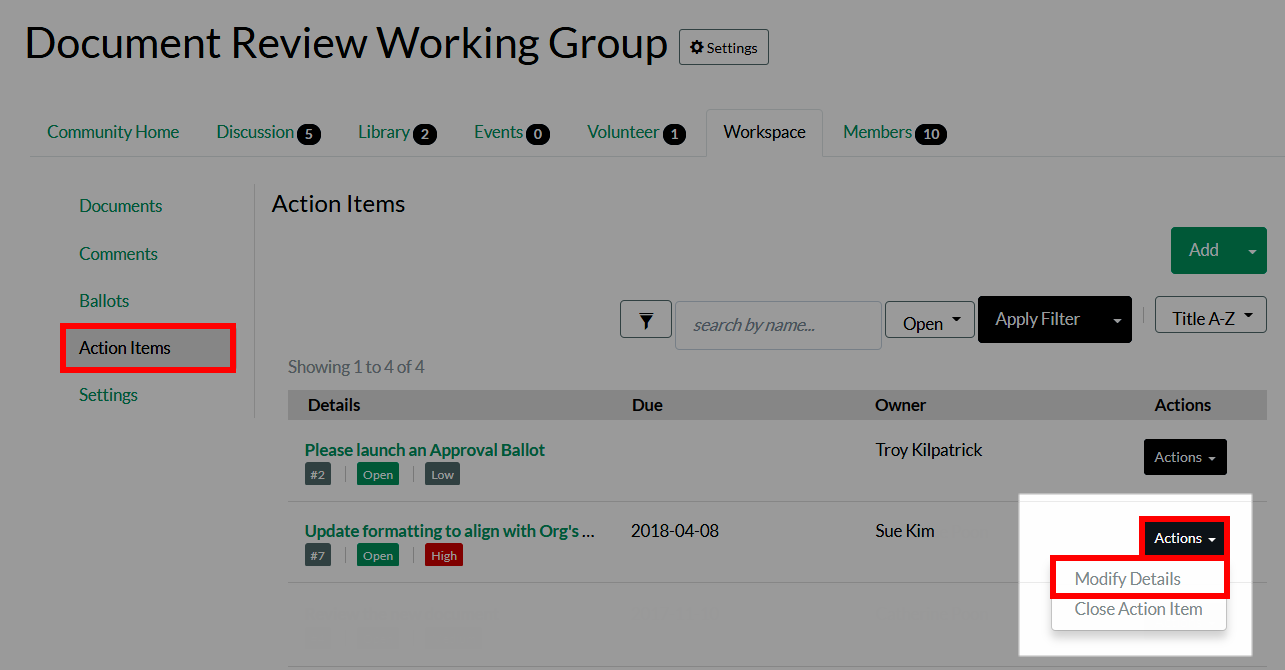
- Click the Action Items tab.
- Select Modify Details from the action item's Actions menu
- On the resulting page, scroll down to the Related Projects option. Select the Project(s) to associate the action item to. A check mark displays next to the selected Project(s).
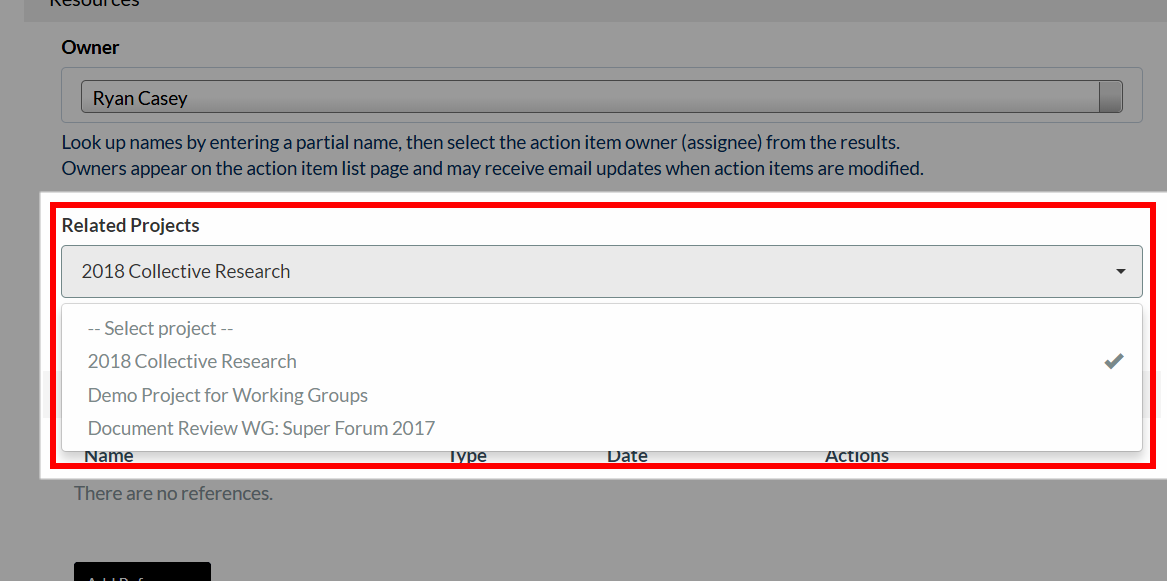
- Click Save to associate the action item to the selected Project(s).