Workspace allows you to upload documents in three ways.
Upload a Single Document
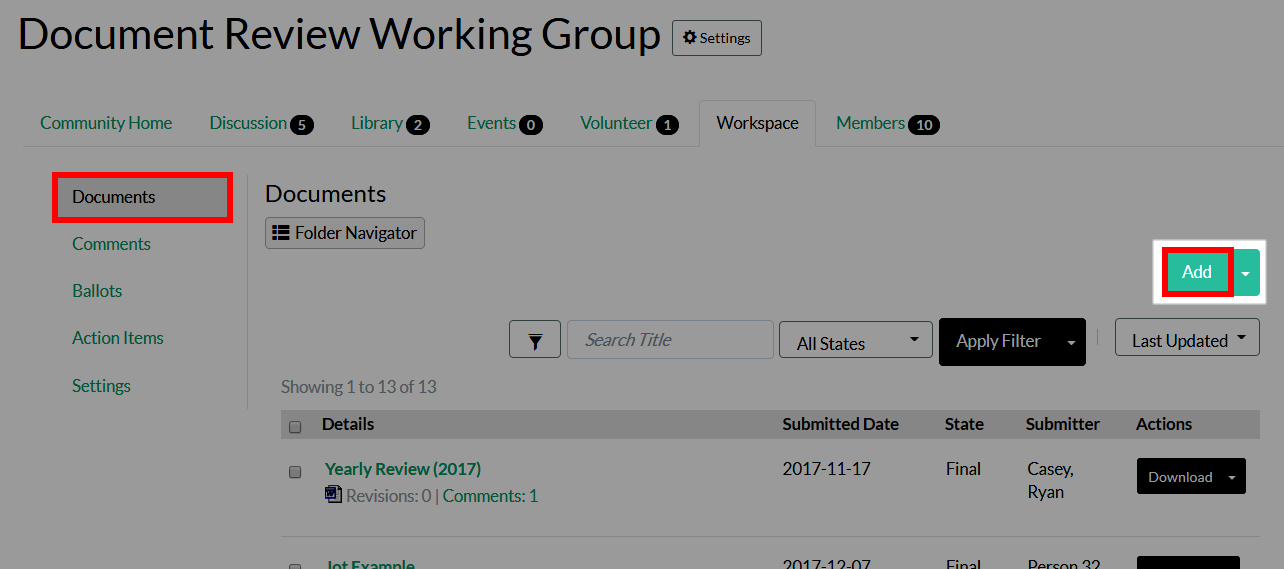
On the Documents tab:
- Click Add.

- Complete the form to configure your new document.
Options
| Field | Description |
|---|---|
| Details | |
| Document Display Title | The document's displayed name across Workspace's various pages. NOTE: If Auto Naming is enabled for the folder, you won't be able to enter a document name and the folder's configured naming scheme will be used instead. |
| Uploaded Document Title |
The document's actual file name (i.e., the name of the document when downloaded). By default, a document's actual file name is used, but you can update it here, if needed. This is useful in instances where a document's file name is too long, clunky, or indecipherable. EXAMPLE: If someone uploaded a Word document titled 02-23-2018_annual_meeting_notes_AZ, you could simplify it to Feb2018AZMeeting. |
| Document Number | An optional alphanumeric string used to uniquely identify the document. Document numbers are displayed on a document's Details page (and elsewhere, as needed). |
| Document Source | You can upload a document in two ways:
NOTE: Files cannot exceed 1024 MB. |
| Description | An optional description applicable to all revisions of the document. |
| Submitter | The individual tagged as the document submitter (your name is entered, by default). Setting the owner name can be useful when importing historical documents into the archive. |
| Submission Date | The date the document was uploaded. You can't choose a future date but can choose a past date, which is useful for retroactively uploading documents. |
| Technical Contact | You can identify a technical contact or editor for the document. Their contact information is displayed on the document's Details page, and on other pages that list the document as a reference item (ballots, calendar events, action items). In addition, when users add a comment to this document, they'll be able to send a notification specifically to the Technical Contact. |
| Folder | Here, you must specify which folder to add the document to. You'll be able to choose from any folders that have been created. NOTE: See Organize Your Documents to learn more. |
| State |
Tag the document with the desired State. By default, you'll be able to choose Draft and Final, but admins can create custom States to meet your document work flow needsadmins can create additional States to meet your document work flow needs on the Admin > Workspace > Settings > Manage Document States page. NOTE: See Document States to learn more. |
| Related Projects | If applicable, you can associate the document to other projects, helping clarify its role or impact in related areas and provide easy linking between projects. |
| Comment Permissions | Set who can ADD and VIEW comments for this document. Comments are stored independently from the document itself, and can be found on the Comments tab. NOTE: This option is only available if Comments are enabled for the community's Workspace. |
| Notifications | |
| This group's mailing list | Check this to notify all members of this group about your uploaded document. |
| CC | Here, you can send a notification to specific people by entering their email addresses in a comma-separated list (e.g., sue@myorg.org,bill@anotherorg.org). NOTE: Recipients copied here may not be able to download the document if they're not a member of the group, or a member of a group with which the document is shared. |
| Submitter Note | If you'd like to include a message in your notification email, you can add one here. |
- Click Add Document at the bottom of the page to add your document to the chosen folder.
Quick Upload a Single Document
NOTE: This method enables you to quickly upload a document without having to complete the main form. While easier, the downside is you can't include certain document details, like a title, document number, or description, or control other options like assigning a Technical Contact or managing Comment Permissions.
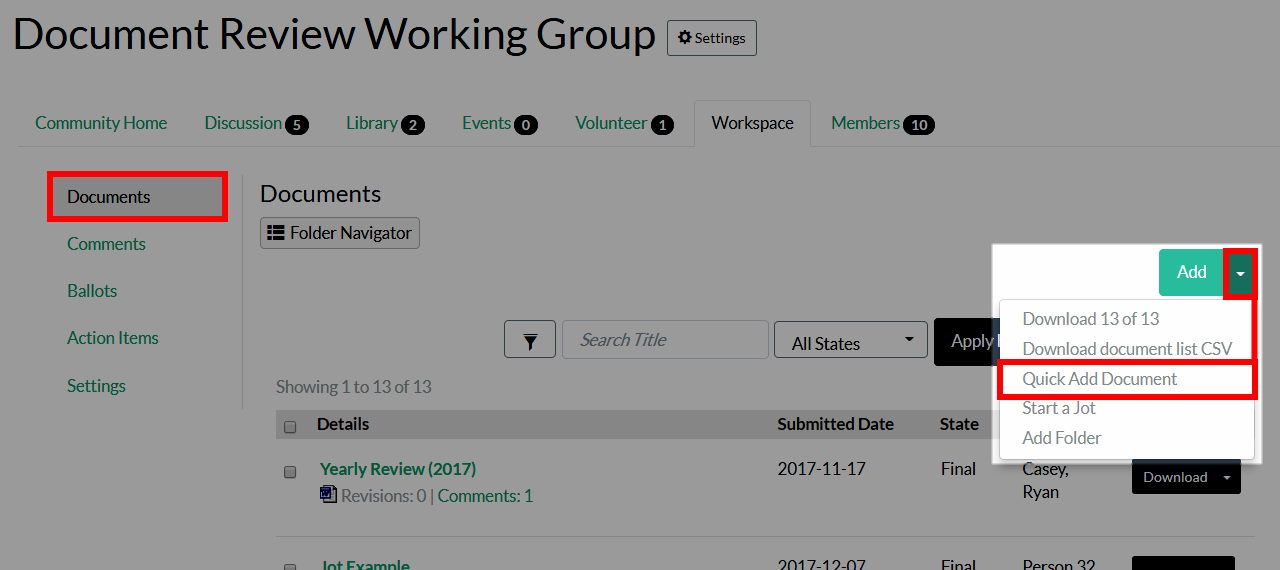
On the Documents tab:
- Click the Actions menu.
- Select Quick Add Document.

- Configure the options and click Upload to add your document to the chosen folder.
NOTE: A file cannot exceed 1024 MB.
Upload Multiple Documents
Keep the following in mind when uploading multiple documents:
- Just like with Quick Add, you can't include certain details about each document when uploading this way, like a title, description, or document number. If this level of detail is desired, you'll need to upload a single document at a time using the method outlined in the Upload a Single Document section above.
- A notification email is NOT sent when adding multiple documents.
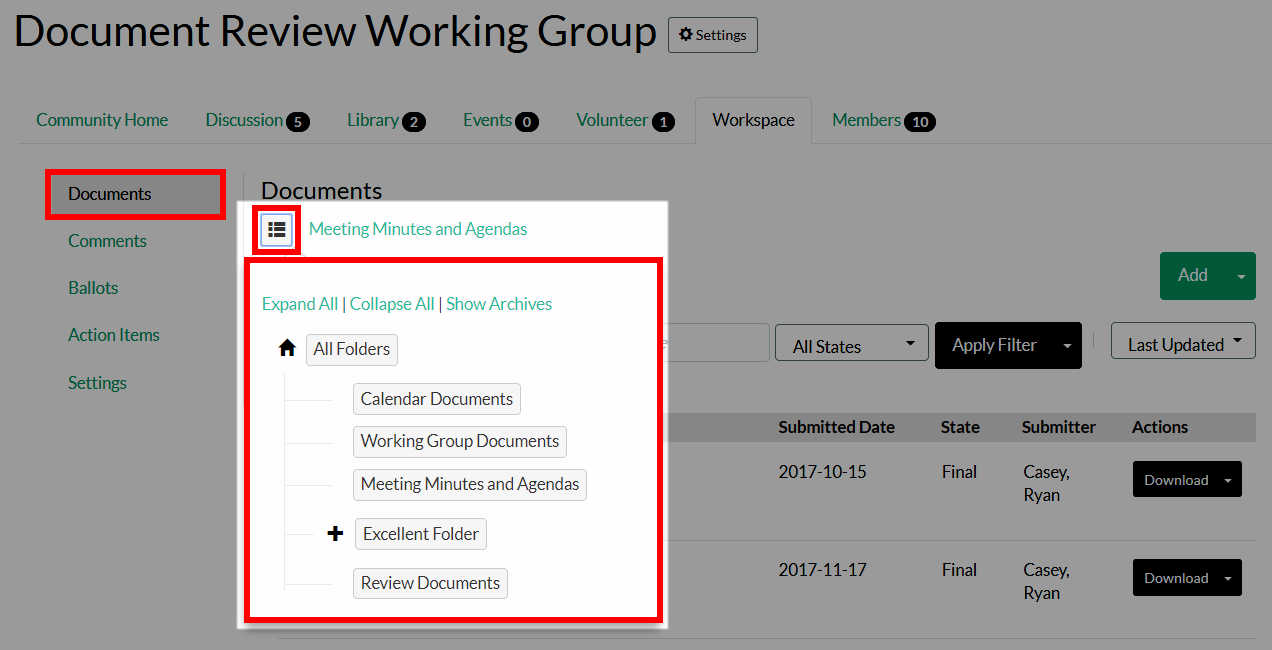
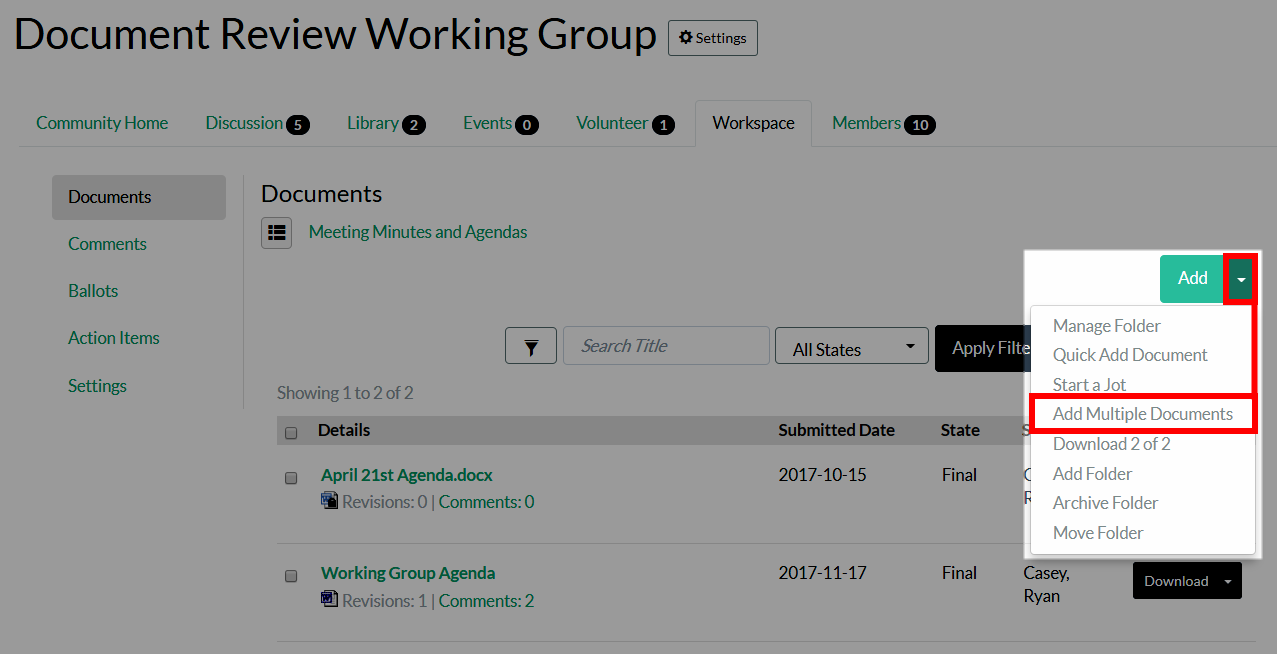
On the Documents tab:
- Unlike the other two methods, you can only add multiple documents from a specific folder. So, to begin, click Folder Navigator and select the desired folder.

- Click the Actions menu.
- Select Add Multiple Documents.

- Complete the form to configure your documents.
Options
| Field | Description |
|---|---|
| Document Sources | You can add up to 10 documents by clicking the available Choose File buttons to browse your computer or network for the desired documents. NOTE: A file cannot exceed 1024 MB. |
| Folder | Here, you must specify which folder to add the document to. You'll be able to choose from any folders that have been created. NOTE: See Organize Your Documents to learn more. |
| State |
Tag the document with the desired State. By default, you'll be able to choose Draft and Final, but admins can create custom States to meet your document work flow needs on the Admin > Workspace > Settings > Manage Document States page. NOTE: See Document States to learn more. |
| Comment Permissions | Set who can ADD and VIEW comments for this document. Comments are stored independently from the document itself, and can be found on the Comments tab. NOTE: This option is only available if Comments are enabled for the community's Workspace. |
- Click Upload Documents at the bottom of the page to add your documents to the chosen folder.