Landing Pages are data-collection forms that enhance the iMIS integration by simplifying the exchange and synchronization of data through Integrated Preference Management (IPM), which creates a better experience for subscribers and more precise targeting for the organization.
You can take advantage of IPM by setting up user-defined tables and fields in iMIS (iMIS "interests") and then selecting them as Remote Interests in Higher Logic Thrive Marketing Professional (Thrive Marketing Professional). When you include remote interests on your landing page, you can easily collect subscriber information and update subscriber preferences.
iMIS Interests
An interest is a way to group subscribers who have similar preferences. For example, all subscribers who have indicated that they do not want (opted out) to receive Event-related mailings could comprise an interest (for example, Opt Out of Events) that is specific to their preference. One special quality of an interest is that a corresponding target group is automatically created with each interest.
Select Remote Interests
- Navigate to Subscribers > Profile Fields.
- Click the Profile Fields dropdown list and select iMIS Remote Interests.

- Click Manage iMIS Remote Interests on the left.

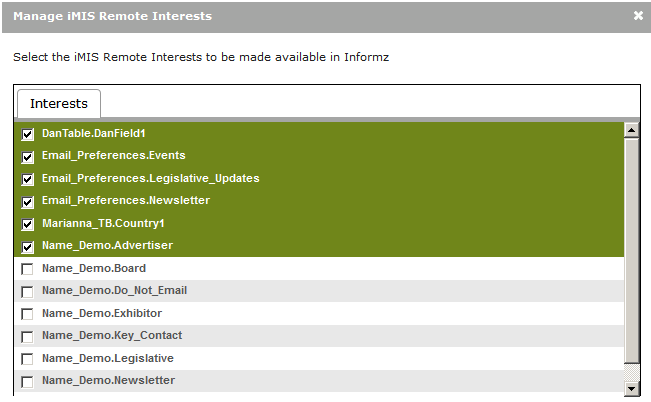
The Manage iMIS Remote Interests window opens displaying an alphabetical list of iMIS Interests (presented as user-defined tables and fields, Table.Field).

- Check or uncheck the checkboxes next to the desired remote interests.
NOTE: Interests that are checked in this window will be selectable from Profile Fields > iMIS Remote Interests and be available for use on a landing page.
TIP: If an active iMIS session is simultaneously updating iMIS user-defined tables or fields, click Refresh to update this list of Interests.
- Click Save to save your changes, then click Close.
WARNING: If a checked interest in this list gets unchecked and that interest has been added to a landing page, it will be automatically removed from all subsequent uses of that landing page. Recheck the interest to re-add it to the landing page.
Create a Landing Page
Before you create a landing page, make sure that the remote interests are available. Refer to Select Remote Interests to learn how to do this.
- Navigate to Marketing Automation > Landing Pages.
- Click Create.
- On the Form tab select one of the templates.
Use the left and right arrows to scroll through the selections.

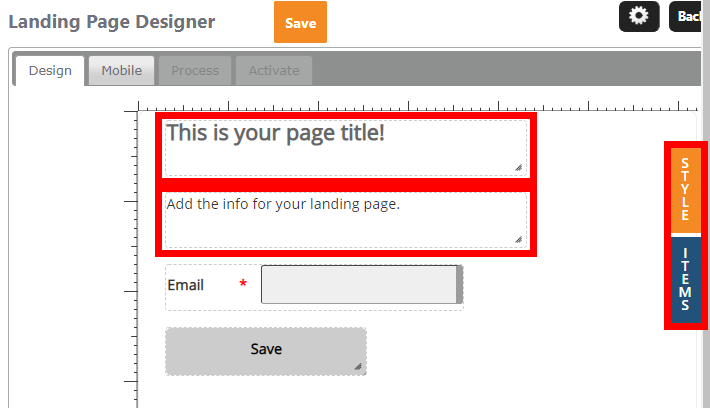
- On the Landing Page Designer page replace the placeholder text with your own.

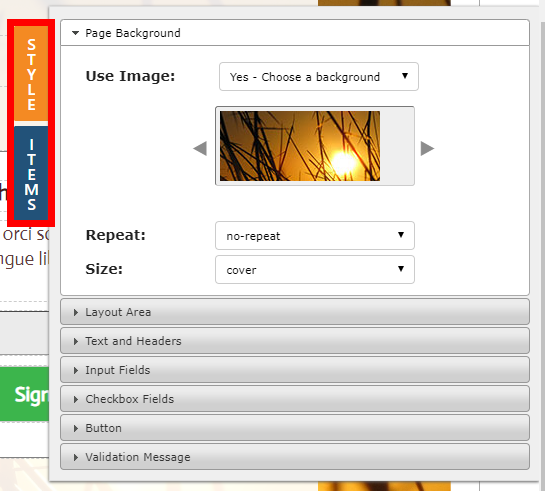
- Click the Style and Items tabs on the right to access various page-design options. (Learn more about Styles and Items.)

- Click Save.
Add Auto-Subscribe Interests
You can add auto-subscribe interests to a landing page as well.
- Click the Process tab of the landing page you're designing.
- Click in the Auto-subscribe Interests field under Change the user's profile.

- Select the interests that you want to be "given to" subscribers after they complete the form.
These interests will be automatically selected when subscribers access the form; they can uncheck them.
- Click Save at the top of the page.
Enable Auto-Fill
You can enable auto-fill so that a subscriber's information automatically populates the landing page.
Auto-fill works only when the landing page is linked in a message because it uses each subscriber's email address as its association with the AMS. This querying of the subscriber email address cannot occur if the landing page is posted to your website.
WARNING: Do not enable this option if there's a risk that the message with the landing page link will be forwarded by subscribers because each "Submit" click will overwrite the previous.
- Click the Process tab of the landing page that you are designing.
- Check the Enable Auto-fill check box under Auto-fill.
- Click Save at the top of the page.
Test a Landing Page for IPM
When you test a landing page for IPM, it's important that you test to an existing record in the host AMS database so that you can confirm that the landing page is picking up the subscriber data in the database. To do this:
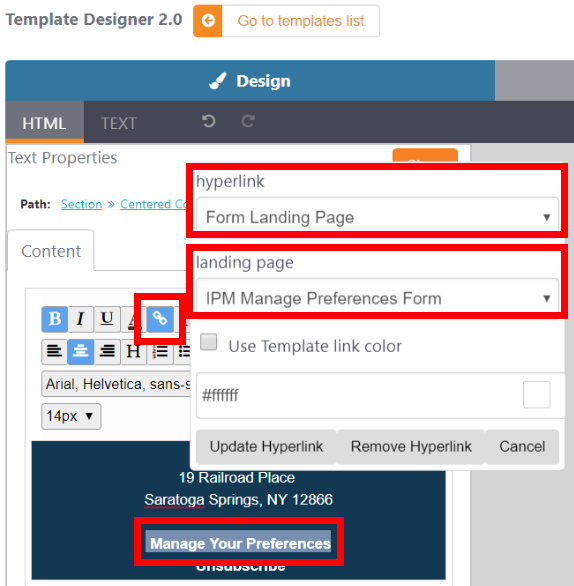
- Insert a link to the IPM landing page in a template.

- Create a message using that template.
- Send a test message to an existing database record.
- Have the test recipient click on the link for the landing page form, and then compete and submit the form.
- Check the host AMS database to ensure that the selections were applied to the test recipient's record.
