Like folders organizing documents, tracks are the categories organizing your event's sessions. All of your event sessions must reside within a track, and you'll want to create the tracks necessary for your event before moving on to session creation.
In this article, you'll learn how to:
- access a track's home page,
- edit the configuration settings of a track,
- add HTML content to a track Home page, and
- delete a track altogether.
View your tracks
Each track you create has its own dedicated Home page, where people can come to:
- learn more about the types of sessions they can expect to attend,
- collaborate with track members in its discussion (only if they've joined the track),
- view its resources (and upload, if an admin), like recorded sessions, webinars, and podcasts,
- and, on the Attendees tab, view other people who have joined the track.
To access a complete listing of your tracks:
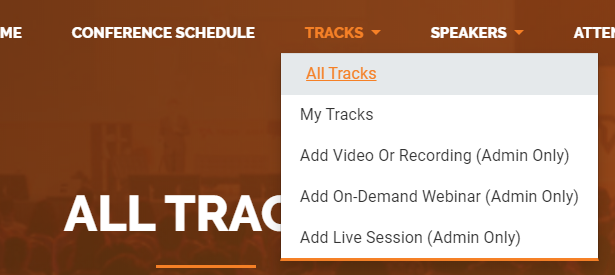
- Navigate to Tracks > All Tracks.
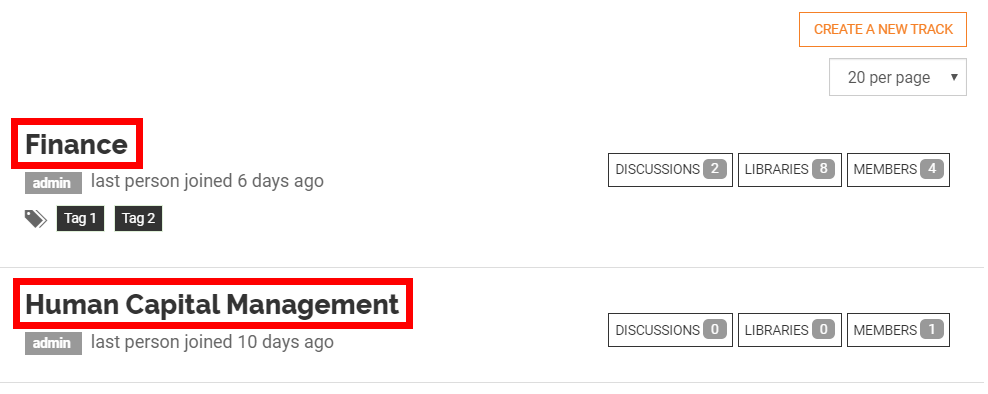
- All of your tracks are listed. Click the title of the track you want to view and/or edit.
Edit a track
On the track's dedicated Home page:
- Click the Settings menu, followed by Settings in the Administration area.
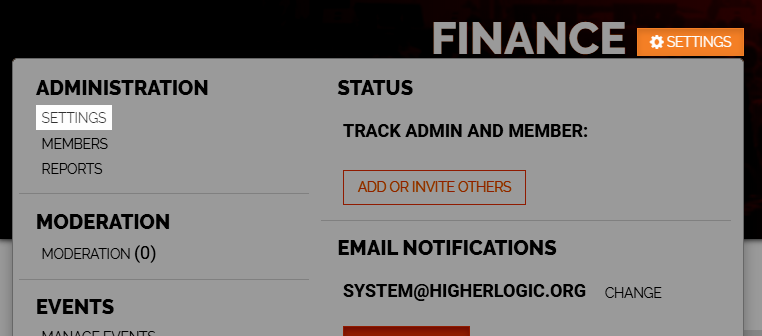
- Make your desired updates. Refer to the Settings table below for descriptions of each setting.
- Click Save to apply them.
Settings
| Field | Description |
|---|---|
| Name | Give the track a name. This title is displayed on the track's Home page and All Tracks page. |
| Type | The default track Type created and configured for your organization is pre-selected for you. |
| Description | Provide a description, purpose, or mission statement for the track. This information displays on the All Tracks page, and gives users general information about the track. |
| Who can join? | Select one of these options to set the track's join permissions:
|
| Who can view? | Select one of these options to set the track's view permissions on the All Tracks page, allowing you to hide specific tracks from specific groups of users:
NOTE: This setting does NOT control who can view a track's content, just its visibility on the All Tracks page.
|
| Moderation Setting | These three options enable you to control the track's discussion (and associated library's) moderation setting:
NOTE: The Moderation setting for a track's discussion is also applied to its associated library. For example, if set to Full Moderation, all files uploaded must be approved before they're available). |
| Features | Each track can have its own discussion forum and/or resource library. Check/uncheck these boxes to control which features the track has available:
|
| Formal Tags | Here, you can manage the track's Formal Tags: Add any tags you want or remove tags by clicking their X button. These are tags specifically defined by Super Admins to reflect your organization's approved tagging taxonomy applicable to your event. Users can apply these tags to their discussion posts and library uploads, and Super Admins can apply them to discussion content, library entries, and tracks. Any tags applied appear along with this related content, giving users more insight into the content or track's purpose and intended audience. Users can also click these tags to view any content in the track tagged with it, making them an excellent way of organizing track content and making it easy to find. See Tags to learn more applying, managing, and reporting on tags. While the article is written in a more community-based fashion, the content is still relevant to tagging for your Event Engagement tracks and content. |
Add HTML content to a track Home page
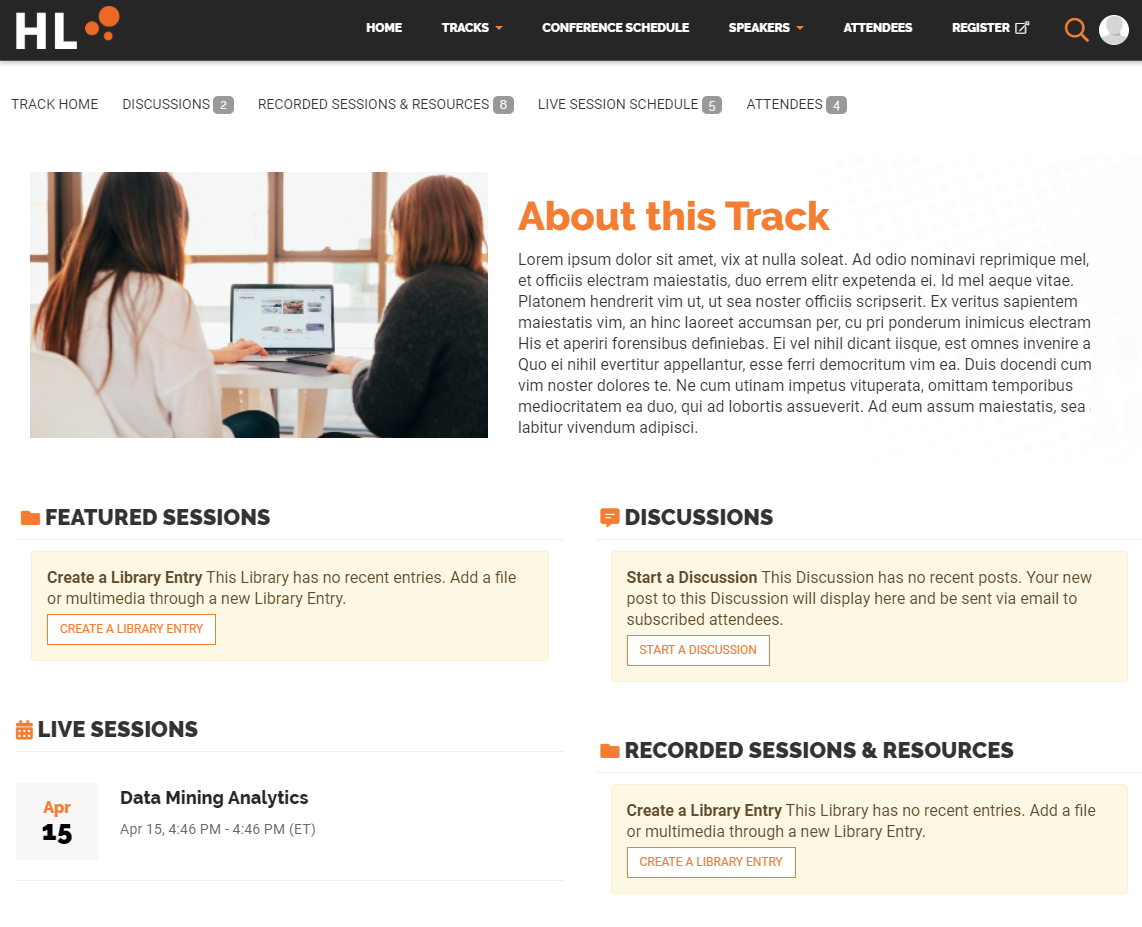
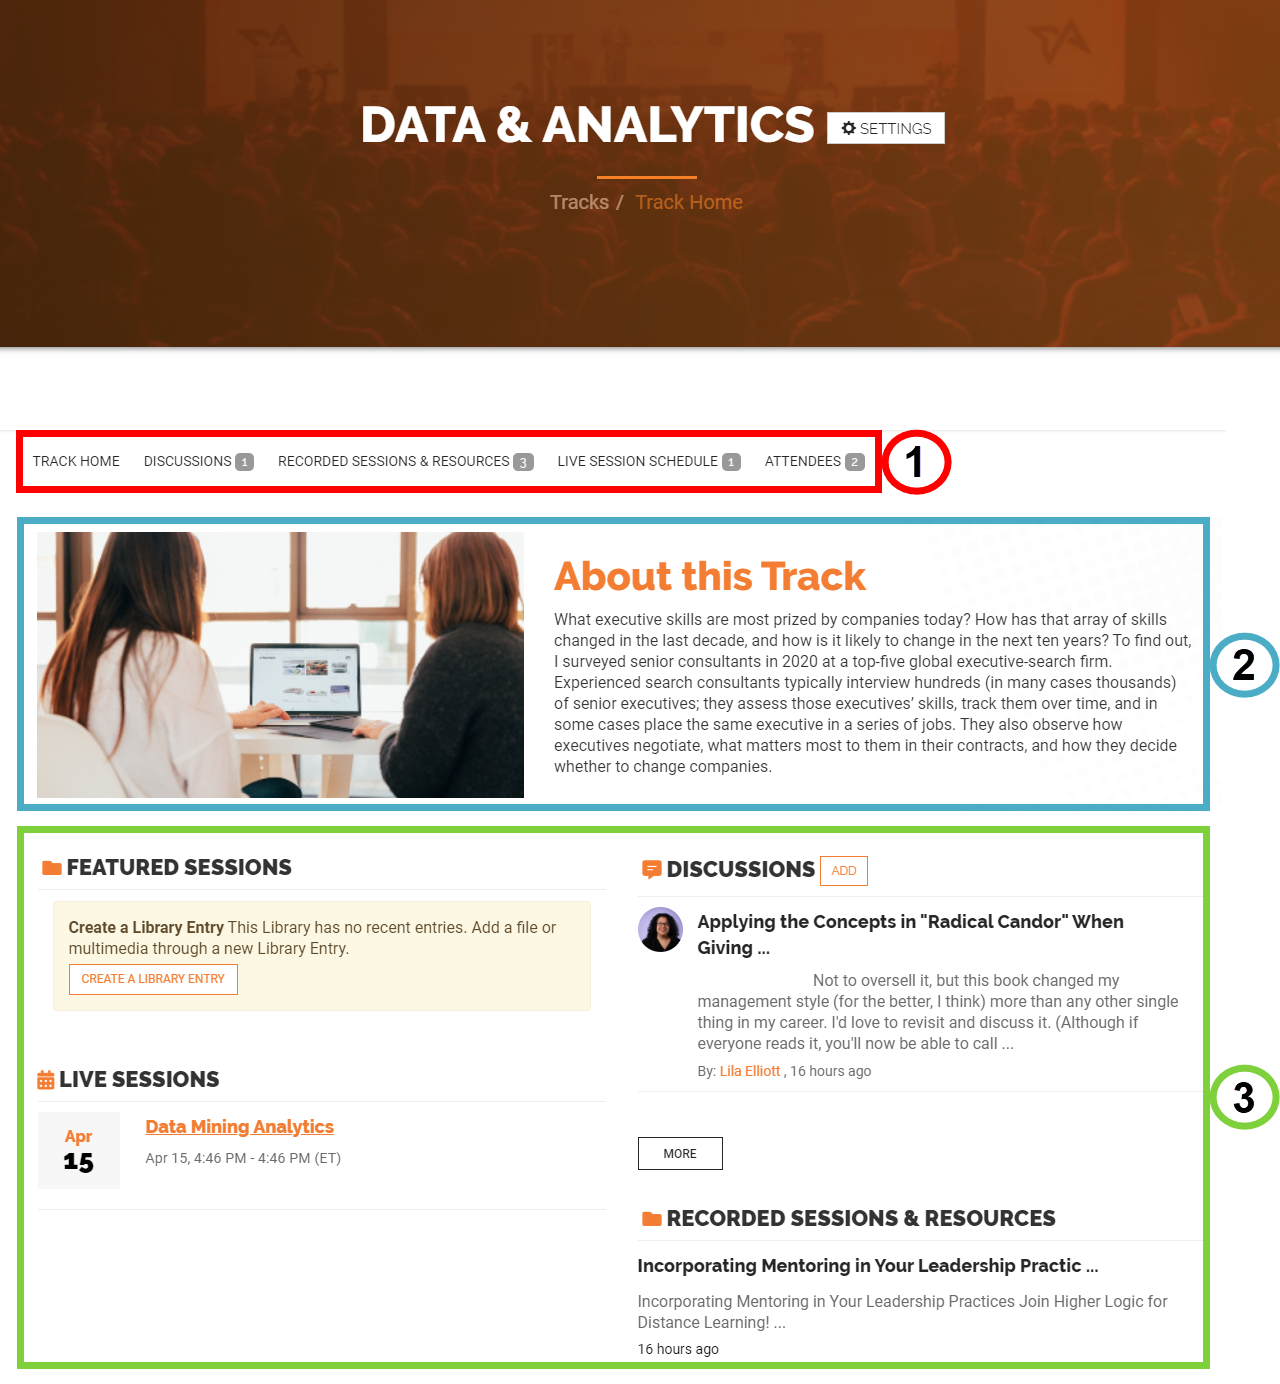
Each of your event tracks has its own dedicated Home page, which comprise three main areas (refer to the image below):
- At the top is the navigation menu, giving you access to each of the track's pages and subsequent details and resources.
- The area below displays optional HTML content admins can add to the track Home page. You'll learn how to add this content in the Steps section below.
- The rest of the home page is dedicated to widgets that automatically populate the most recent discussion posts, upcoming live sessions, and uploaded session recordings and other resources. These widgets make the home page a great place to easily keep up with any new activity in a track.
Add HTML content
Let's take a look at how to add additional HTML content to a track Home page.
- Click Settings > Additional HTML Content.
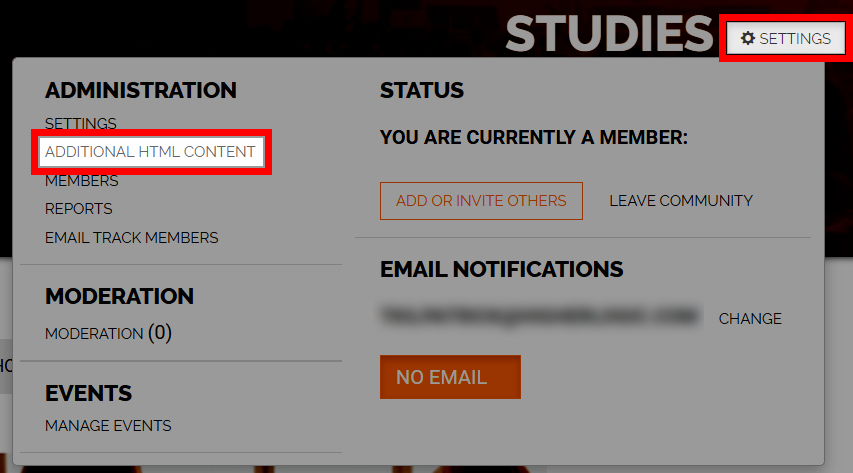
- In the resulting WYSIWYG editor, you can either:
- Use the standard options in the editor toolbar to add and format text, insert images, etc.

- Click the HTML button to access the source code editor, which you can use to write or copy/paste HTML.

NOTE: The maximum image height is 266px, and larger images will automatically scale to this size (the width will also scale accordingly to maintain original aspect ratio). While you can insert large images, they may take longer to load; the recommended size for images in this area is 380 x 260px.
EXAMPLE: Attached at the end of this article is a Notepad file, Additional_HTML_Content_Template.txt. Copy the contents of the text file and paste them into your track as a foundation; then replace the image and text with your own.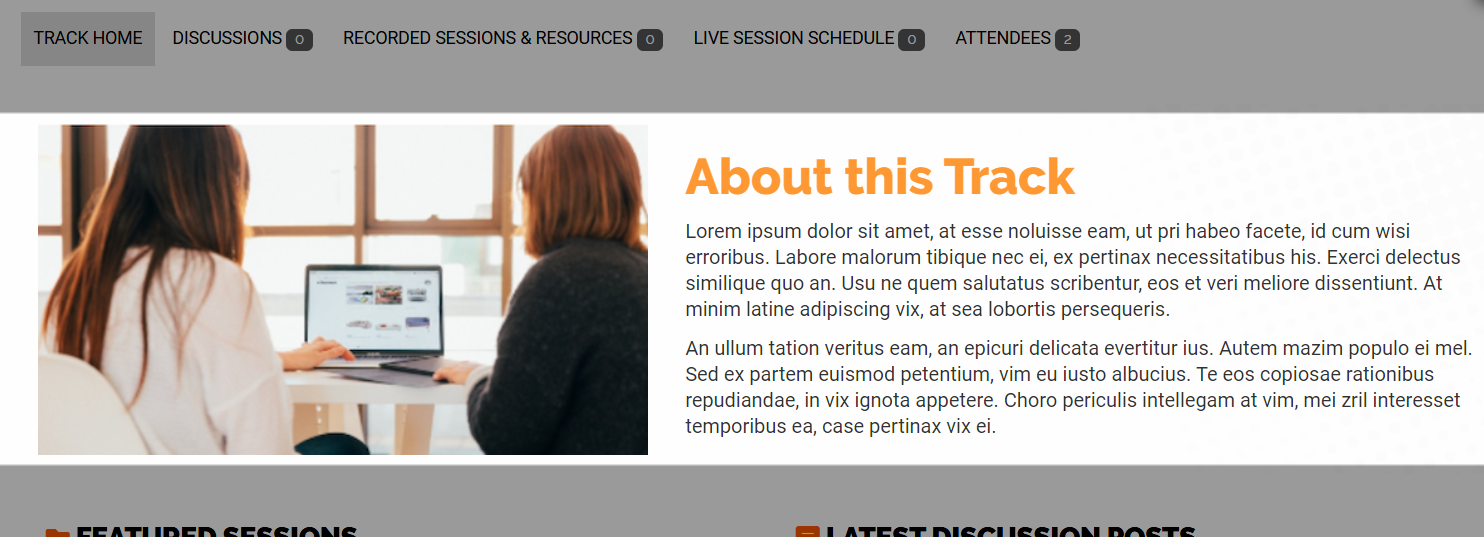
Delete a track
WARNING: Deleting a track is permanent, and all of its discussion posts and uploaded session recordings cannot be recovered.
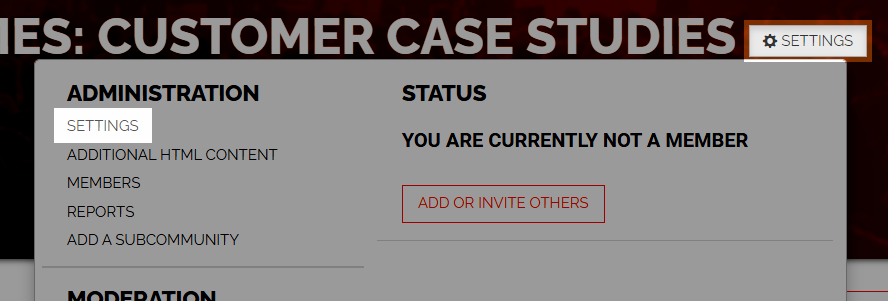
- From the track's Home page, click Settings.
- Click Settings in the resulting menu.
NOTE: All of a track's content must be deleted before the track can be deleted.
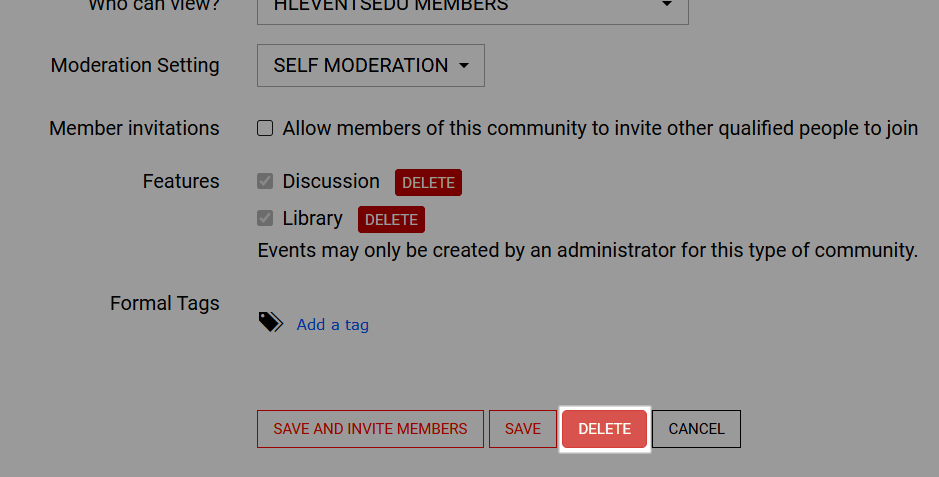
- In the Features area, click Delete to remove all track content.
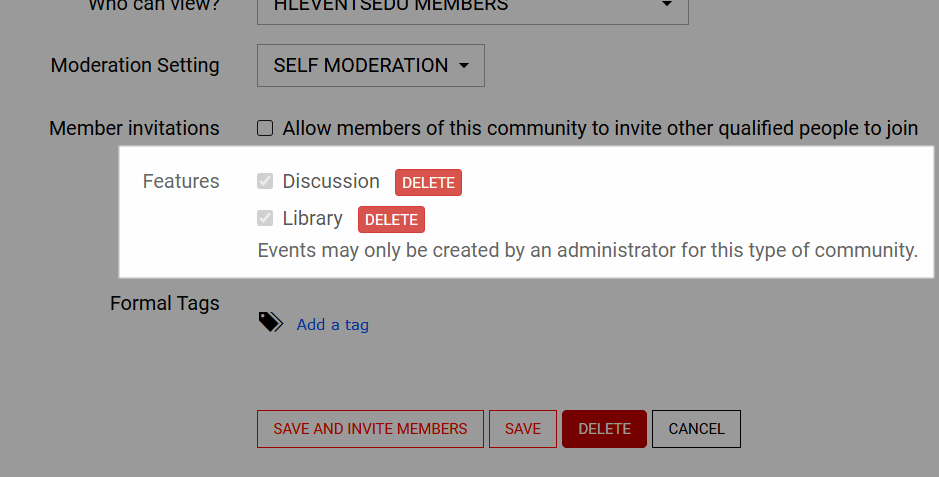
With the track's content deleted, you can now delete the track.
- Click the red Delete button at the bottom of the page to delete the track. All current members of the track will lose their membership and the track will no longer appear on the All Tracks list or from a member's My Tracks page.
